| Introduction |
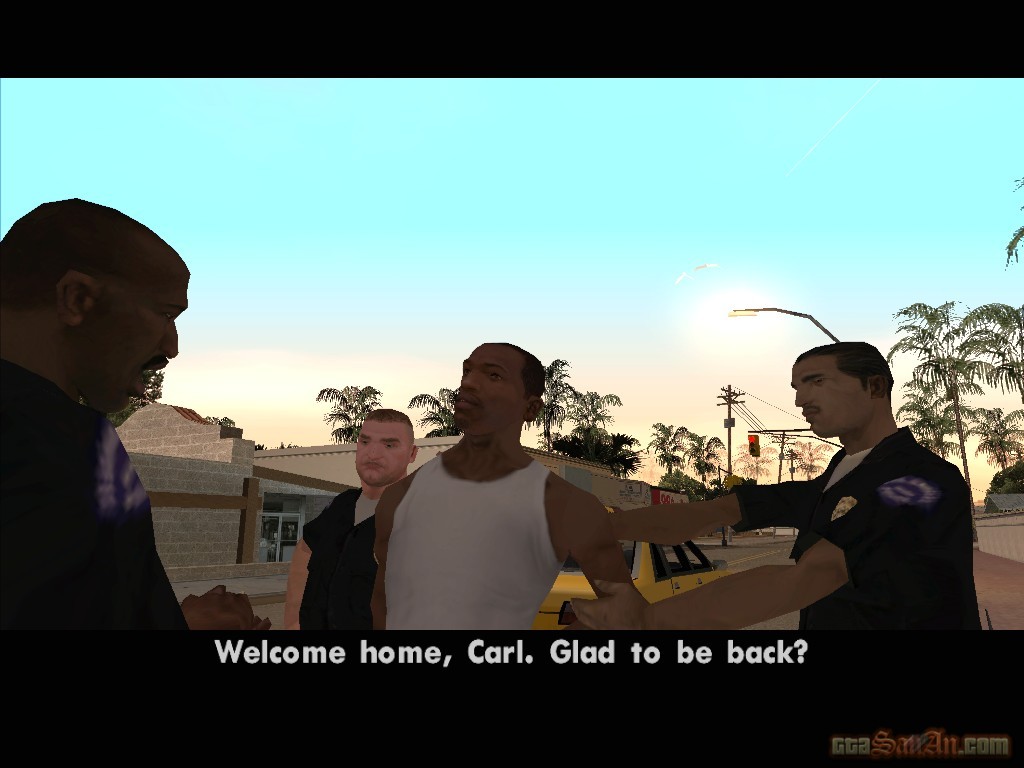
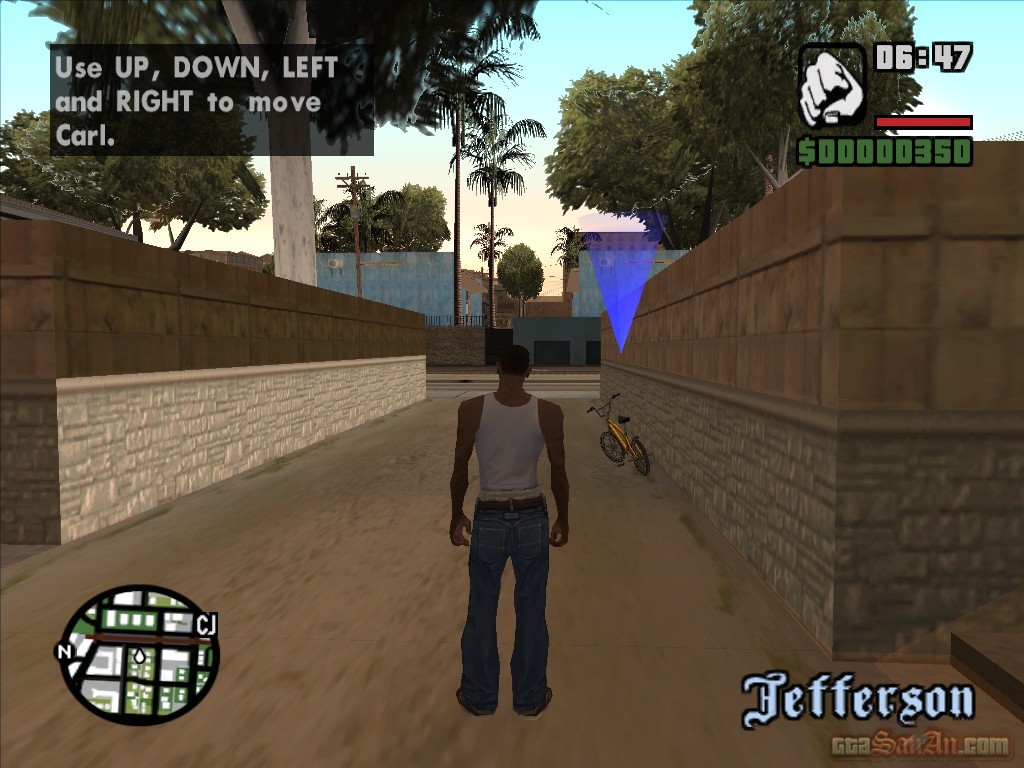
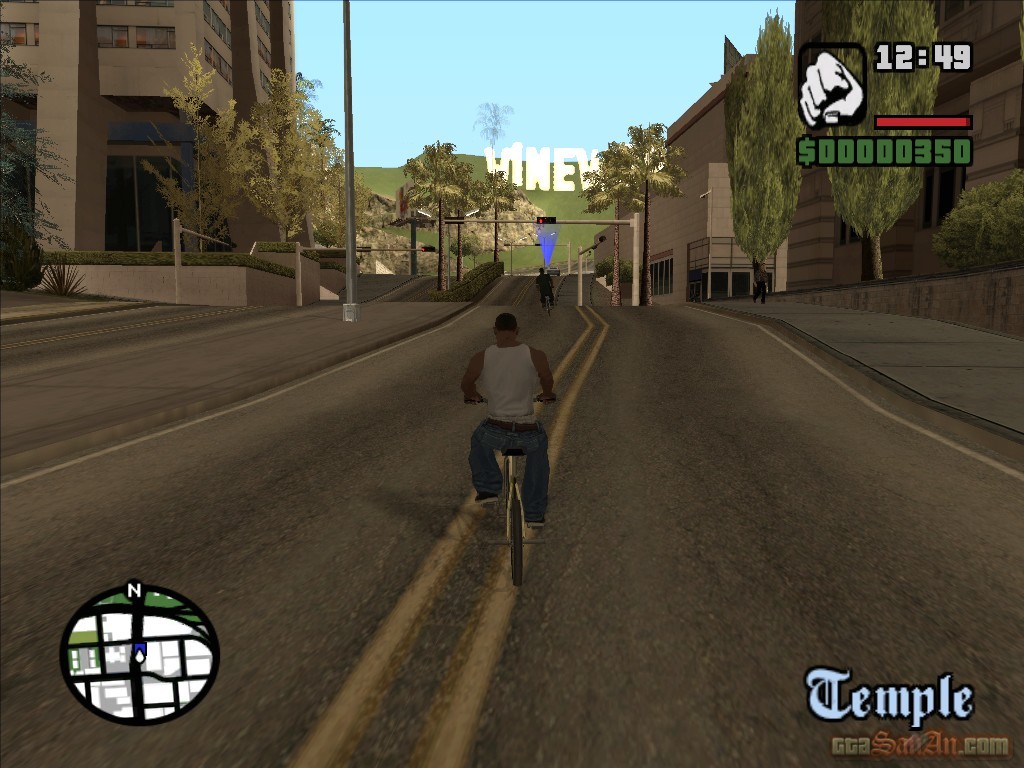
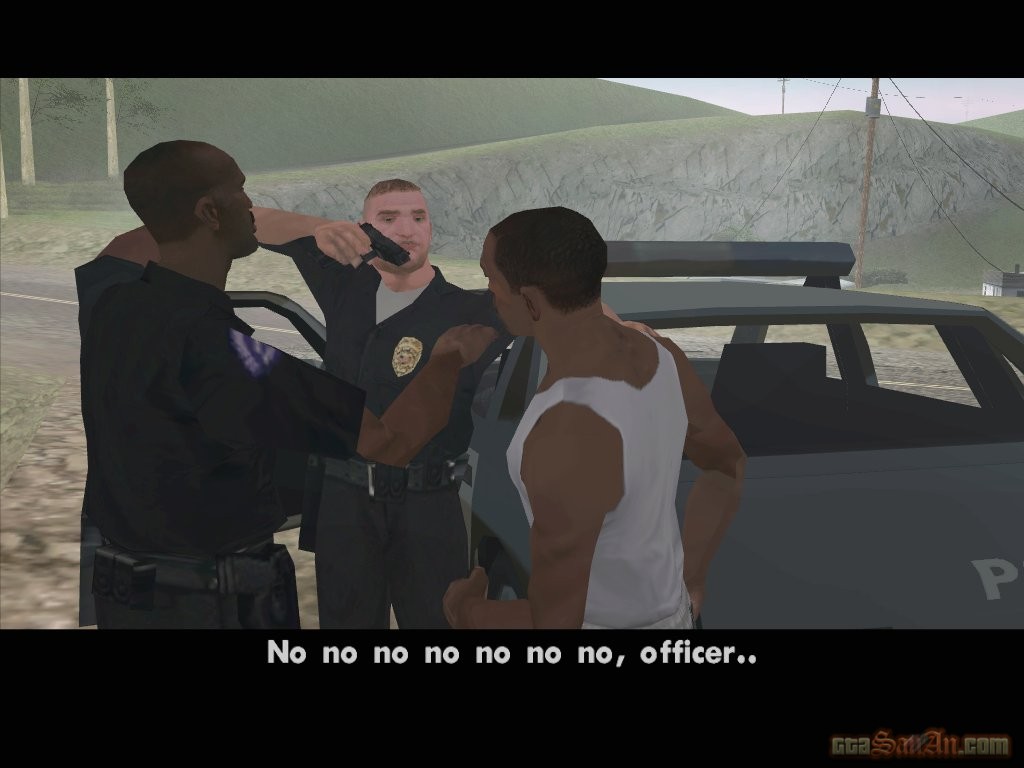
Sweet phones Carl to inform him of his mother's tragic death. Carl begins a journey back to Los Santos. He is greeted by Officer Tenpenny, a crooked cop who has been bullying CJ since before his leave for Liberty City. Tenpenny and his fellow officers, Pulaski and Hernandez, take Carl for a ride. Carl claims that he is clean -- that he is no longer involved with gangs. The officers want something from CJ but when they want it, they will find him. Meanwhile, CJ is thrown from a moving car into Front Yard Ballas territory, a close rival of Grove Street's. Hop on the BMX bicycle in front of you. Begin pedalling, tapping 'X' rapidly to build up momentum. Cycle to the Johnson house by following the 'CJ' icon on the radar. Enter the red marker to trigger the cutscene and progress with the story.
 |  |  |  |
| Big Smoke |
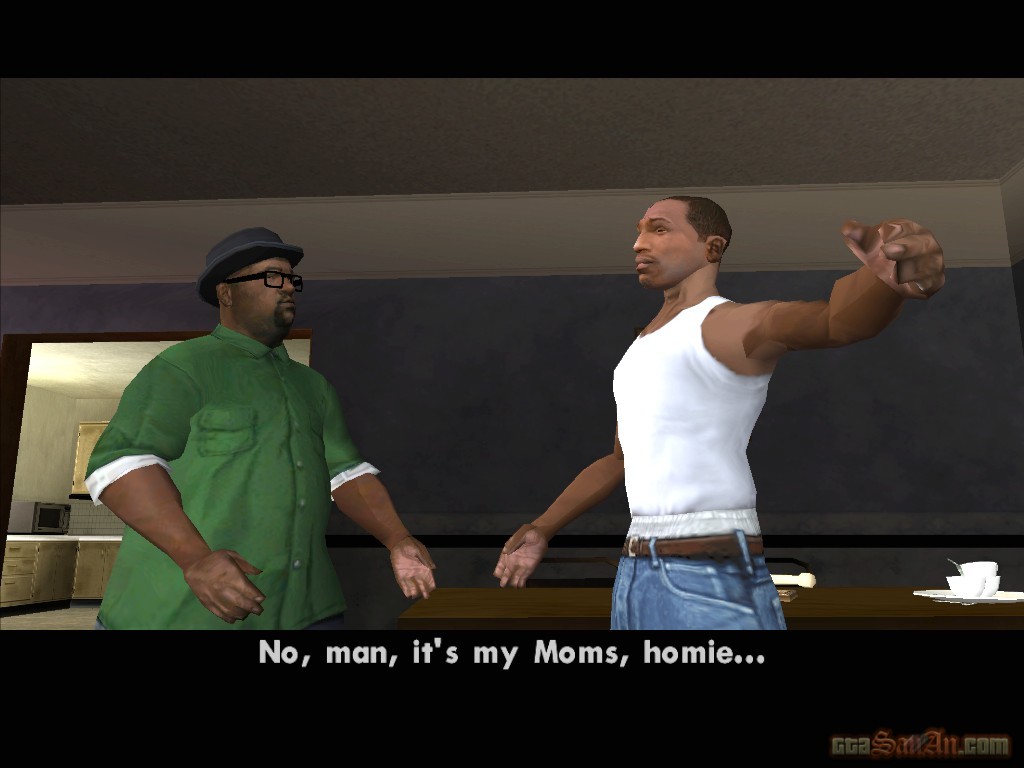
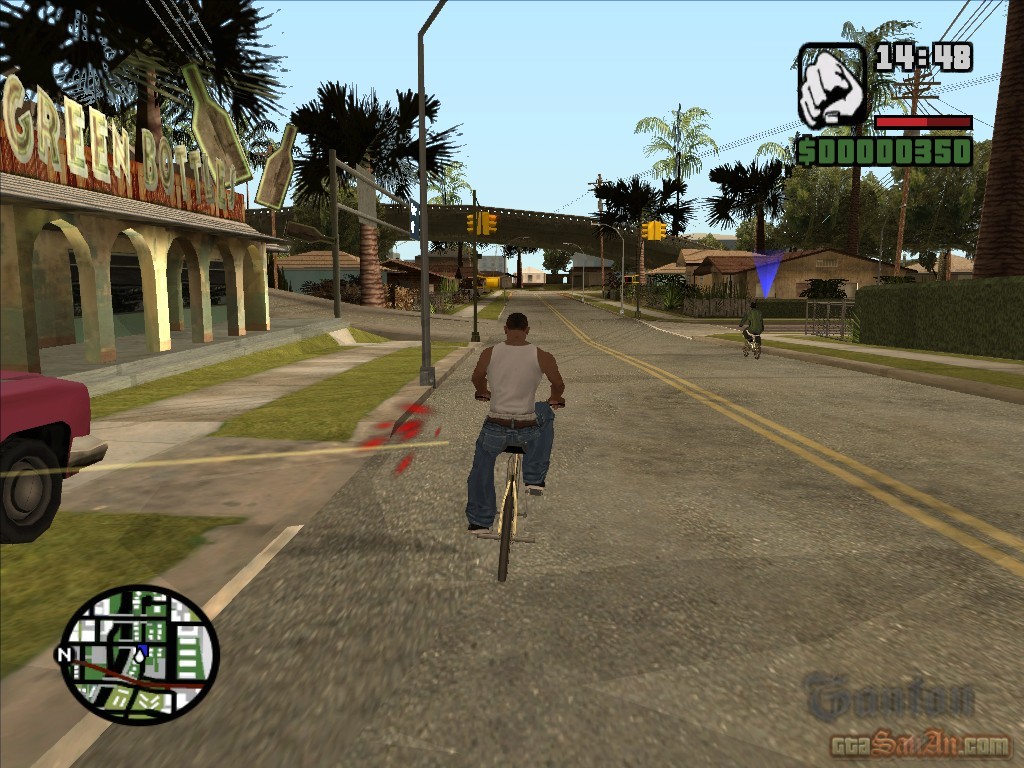
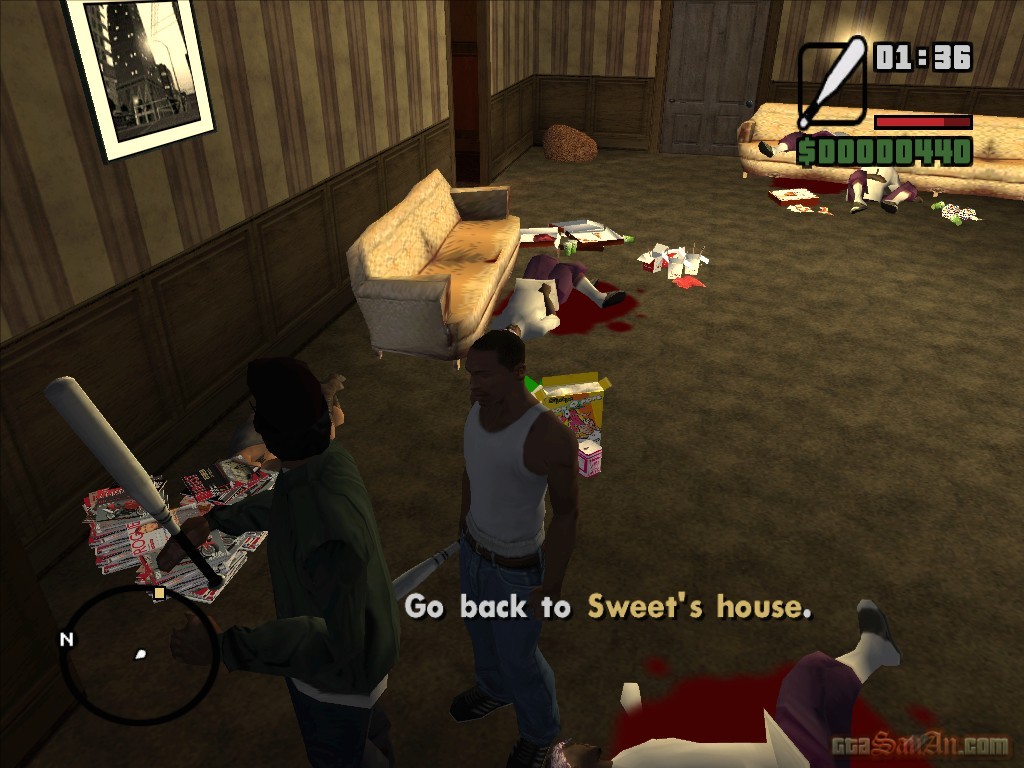
Start this mission by entering the red marker at the Johnson house. Carl decides to refresh his memory by looking at old photos of the Johnson family. Smoke enters the room with a baseball bat, preparing to whack CJ. He realises who it is, and gives a short welcome before driving CJ to the cemetery to meet his brother. Carl meets up with Ryder, Kendl and Sweet. Kendl is glad to see him, but Sweet is still angry that he moved to Liberty City and abandoned his friends and family. The brothers argue, and Kendl leaves to meet her boyfriend Cesar, which Sweet is also unhappy about. Sweet describes the poor situation that Grove Street are in, before leaving the cemetery. The Ballas perform an unexepcted drive-by shooting, destroying Smoke's car. Hop on the bicycle and follow Sweet, repeatedly tapping 'X' to build up momentum. You must maintain a fast speed, as the Ballas will drive along side you and shoot at you constantly. Follow Sweet to the Mulholland Intersection and the homies will split up to avoid the Ballas attack. Smoke and Ryder are waiting. Follow Ryder through the narrow streets, back to the grove, and stop in the red marker.
*Sweet calls and gives you the details of whats been happening while you were gone. The Seville Boulevard Families and the Temple Drive Families were beefing. Whilst this was happening, Ballas and Vagos took over.
 |  |  |  |
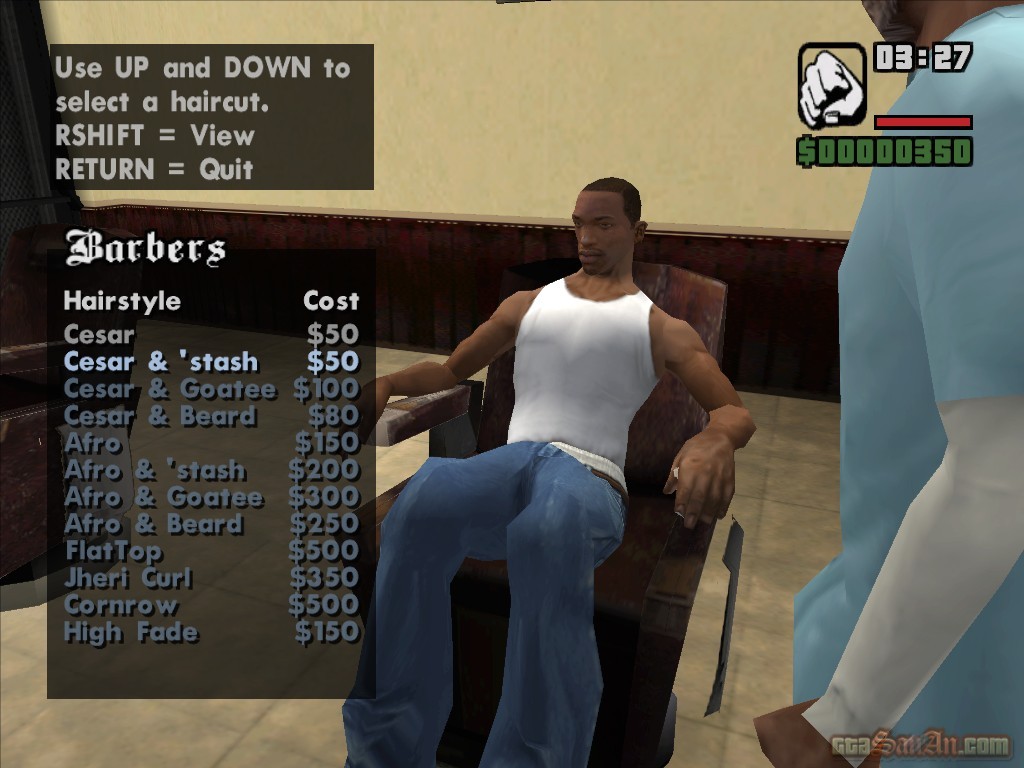
| Ryder |
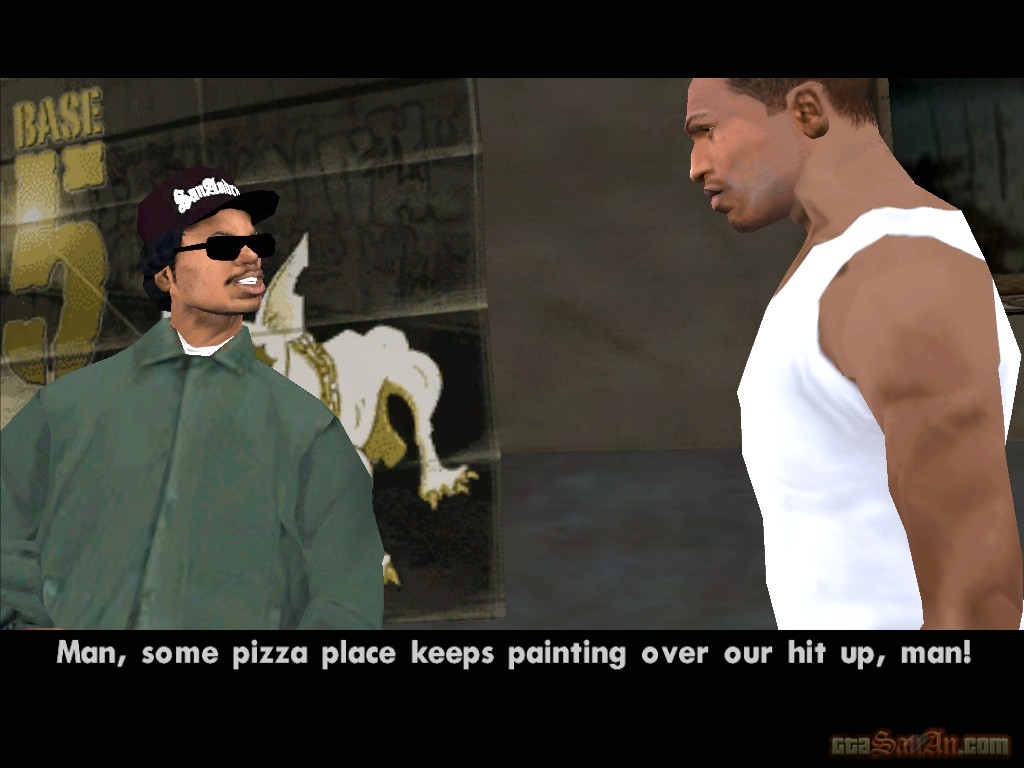
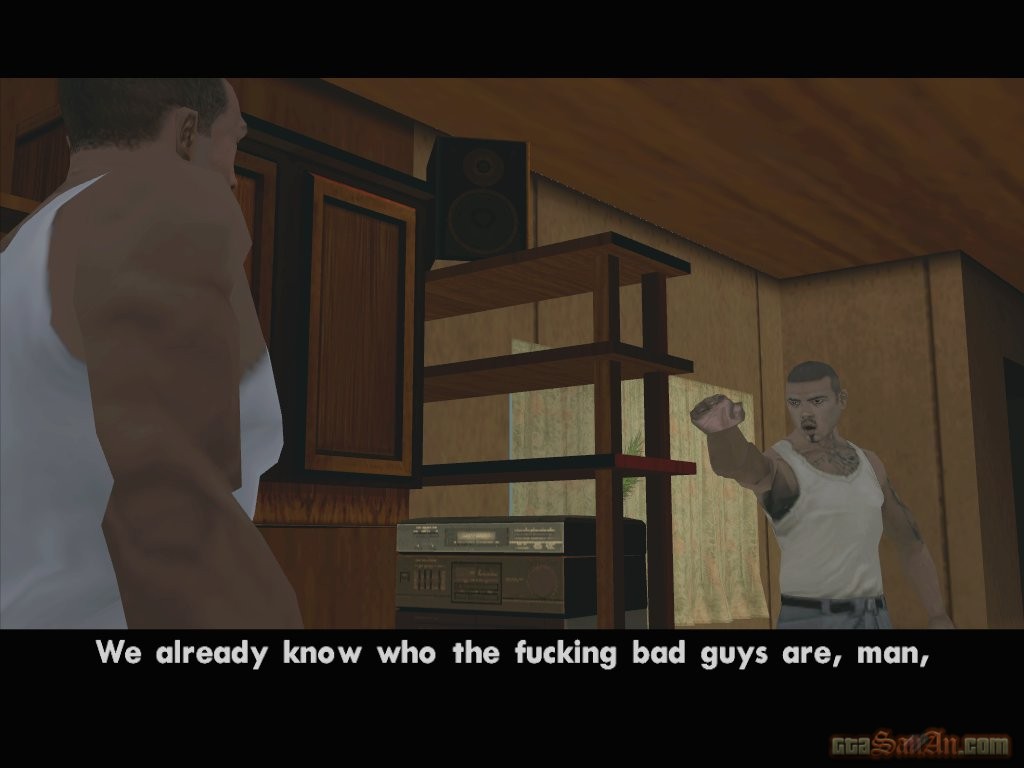
CJ meets Ryder, an old friend very passionate about the Orange Grove Families. Their chat takes places in front of the Badfellas poster (a poster advertising a fictional movie; also appears in GTA3 & Vice City). The owner of Well Stacked Pizza has dis-respected the Orange Grove Families, by clearing the gang graffiti tag from his walls. Ryder invites CJ to pay a visit to the owner, and teach him a harsh lesson. Hop into the pick-up truck outside Ryder's house, and head off to the pizza store. Before arriving, you have the opportunity to get a haircut at Old Reece's hair facial studio. The couple enter the pizza store, and CJ distracts the owner by ordering 'The Full Rack', the largest meal on the menu. Ryder enters the store in disguise. The owner knows that it is Ryder because he looks so small, and brandishes a 12-gauge shotgun, forcing the pair to leg it. Return to the neighbourhood.
 |  |  |  |
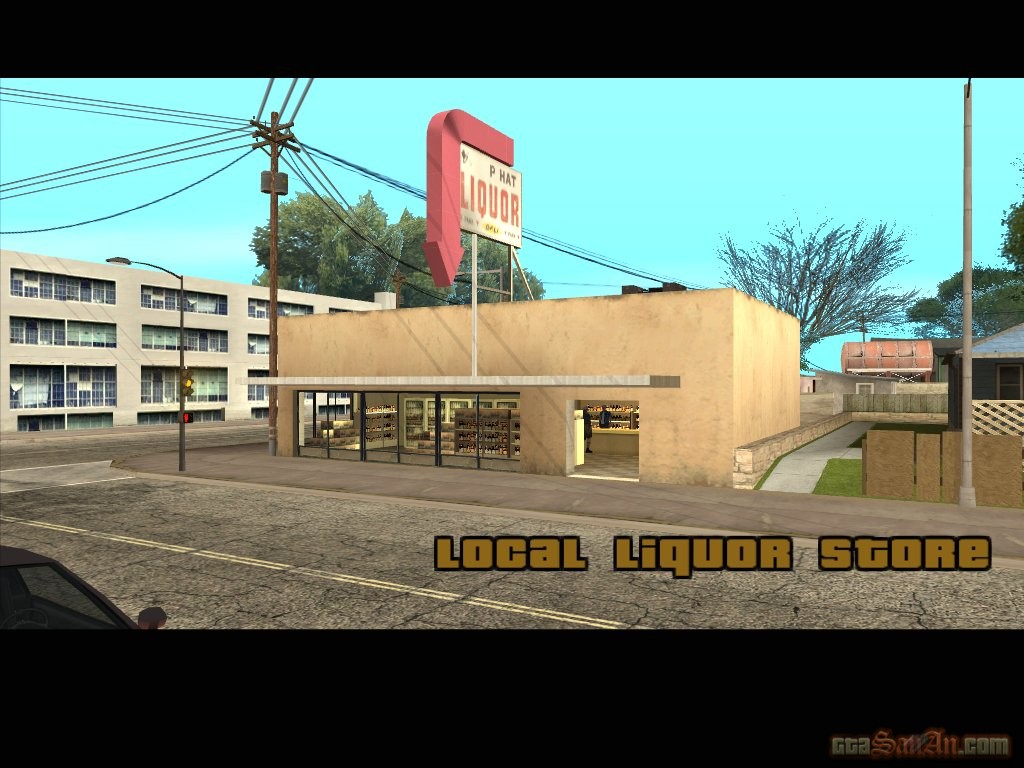
| Tagging up Turf |
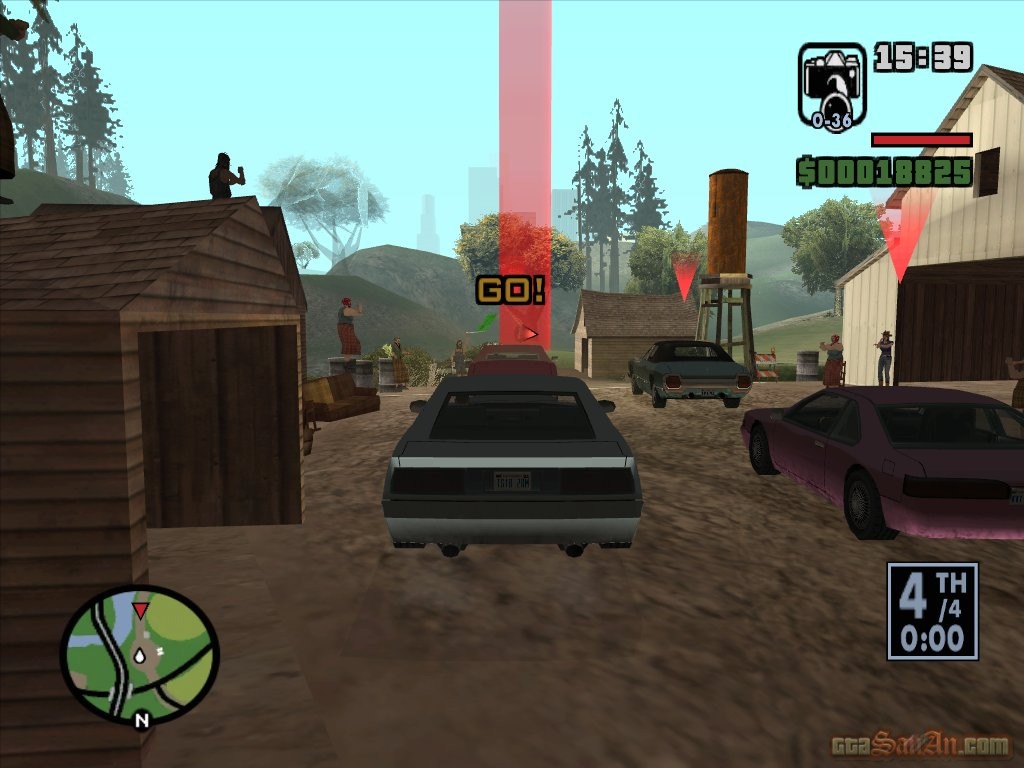
Ryder tells you to go and see Sweet, who is playing basketball with Smoke. You must let the Ballas know that you are back on the set, so it's time to tag up some turf. After the cutscene, notice you'll have an unlimited spray can. Get in Sweet's car and drive to Idlewood. Sweet demonstrates how it's done, and sprays the Grove Street tag over that of the Front Yard Ballas. Now it's your turn. 2 new blips appear on your radar. Follow them, and begin tagging -- one is on front of a house, and the other is on a wall behind the that house. Those were easy, now let's move onto the next level. Drive towards East Los Santos -- Ballas territory. Spray the tag on the wall with the mural.
Goto the next location, and notice 2 Ballas guarding their territory. They will attack you as soon as you begin spraying their tag. You have an option -- you can kill the Ballas before spraying over their tag (you can poison them using the spray can) or you can spray the tag and do a quick runner. The next tag is on a roof. Jump over both fences by using the 'Square' button, and climb onto the section of wall that juts out. From there, climb onto the wall, locate the tag and being spraying. After all 6 tags are sprayed, get in Sweet's car (you can jump off the roof without losing any health) and drive back to the Grove to complete the mission.
*After completing this mission you will recieve a phonecall from Officer Hernandez. Carl hurls abuse at the officer, calling him "their bitch" (referring to Tenpenny and Pulaski). Hernandez demands respect, and forwards a message from Officer Tenpenny: Carl musn't leave Los Santos. If you do decide to leave the city, you'll gain a 4 star wanted level.
 |  |  |  |
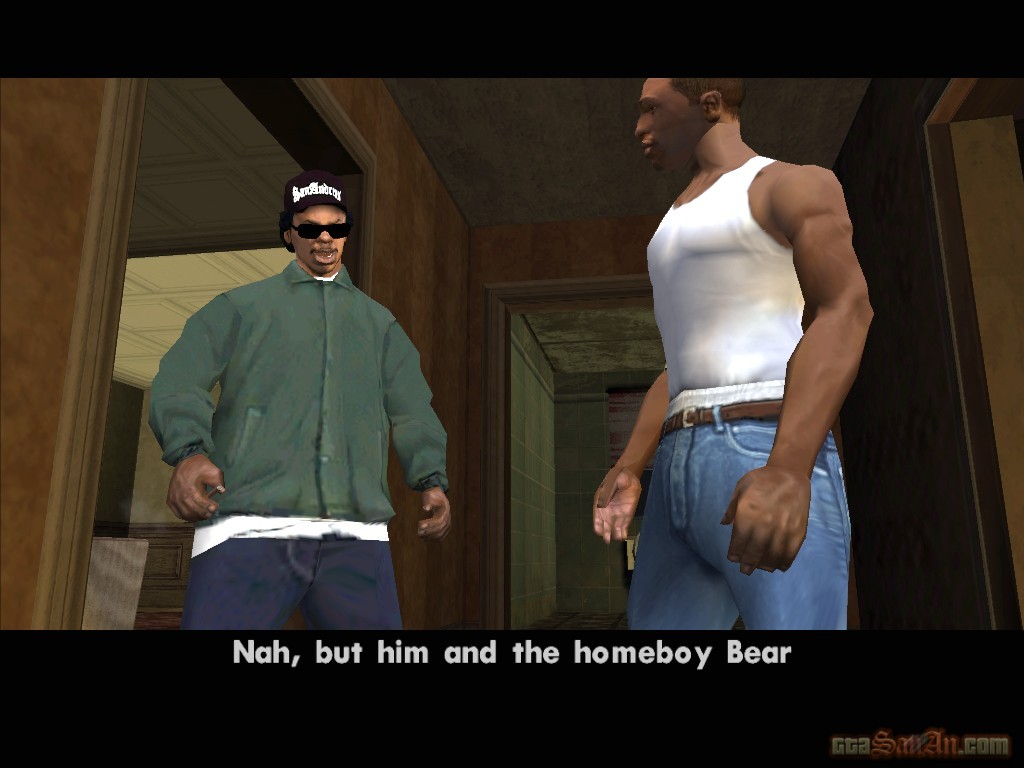
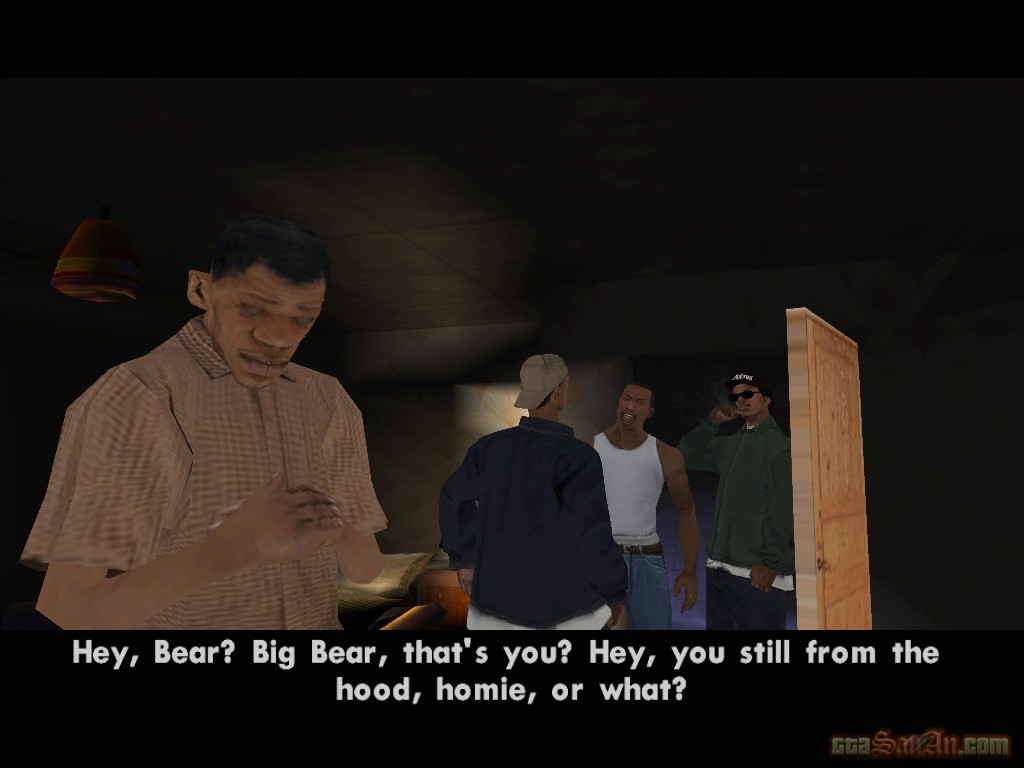
| Cleaning the Hood |
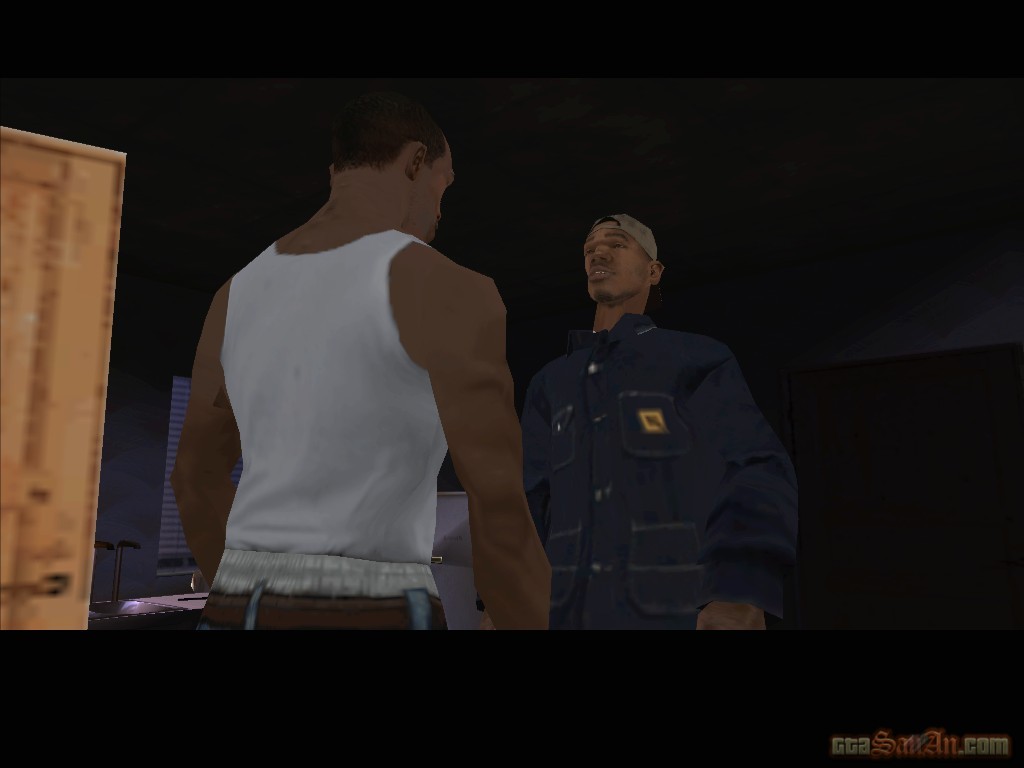
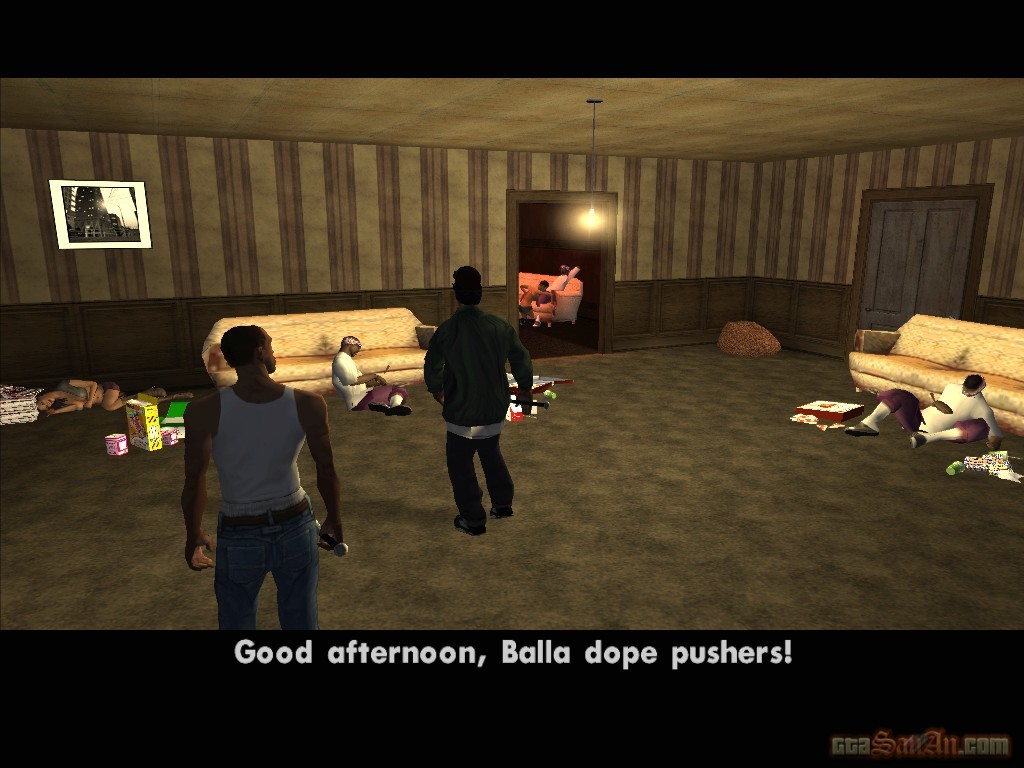
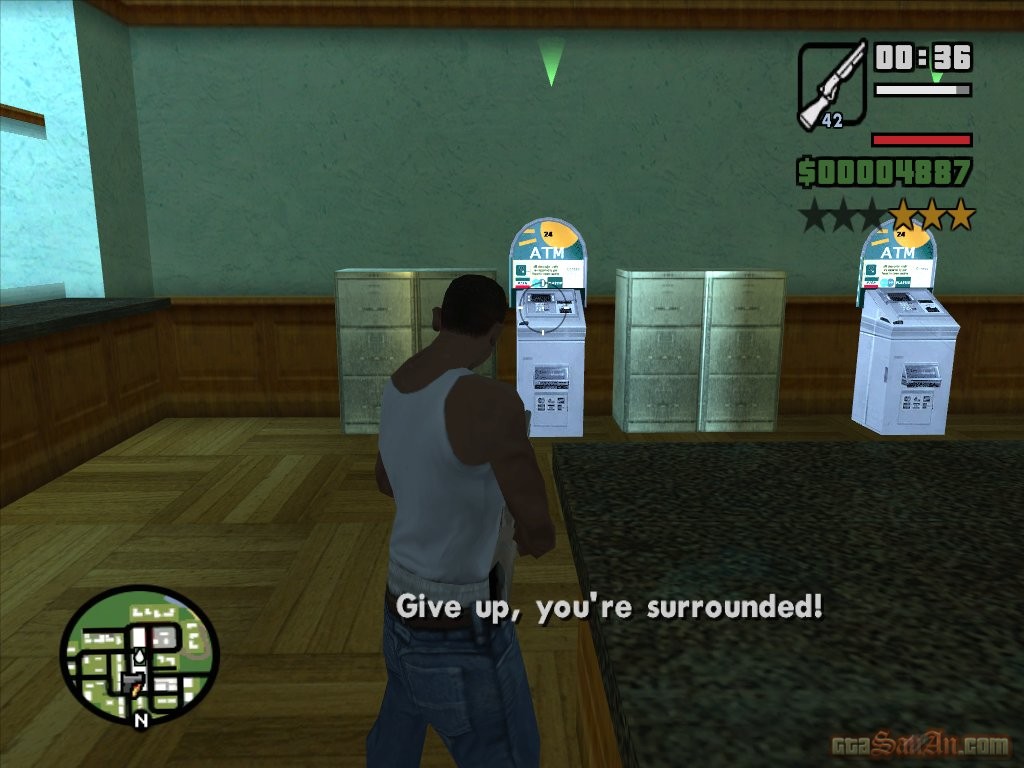
Sweet and Smoke are discussing the terrible state of the hood. It's time to take out the drug dealers that are ruining Grove Street, but you'll need backup. Go with Ryder to meet B-Dup and Big Bear. B-Dup refuses to help and is said to have drfited apart from gangbanging and into "other activies". Big Bear, a Grove Street legend, is clearly in need of help because of drug abuse. Locate the dealer, who is witnessed selling goods to one of your homies. The dealer carries a baseball bat, but nothing to worry about -- a few punches should get rid of him. Ryder recognises the dealer. He used to run with a Front Yard Ballas OG. Head over to the dealer's place in Idlewood. The house is occupied by ballas, dealers and hookers. Make sure there are no survivors. Once the place is clean of anybody that may cause a threat the hood, head back to Grove Street with Ryder. Now the Ballas know that Grove Street are back on their feet -- mission complete.
 |  |  |  |
 |  |  |  |
| Drive-Thru |
Respect has to be earned, just like money. But screw that for now, it's time to eat something. Ryder suggests Tacos, but Smoke wins with his suggestion -- chicken. Drive your homies to the Cluckin' Bell Drive-Thru in Willowfield. During the journey, Carl asks how moms got killed. Ryder explains that they were going for Sweet and that they accidently killed moms. He also explains that some people saw a green sabre doing the work, and then speeding off. When you reach the Cluckin' Bell, drive into the red marker. Carl and Ryder order a No.9, Sweet asks for a No.6 with extra dip, and Smoke goes for two number 9s, a number 9 large, a number 6 with extra dip, a number 7, two number 45s, one with cheese, and a large soda. A Ballas car is seen driving towards the hood.
Your objective is to chase down the gang car before they cap your homies. After the cutscene, speed after the Ballas and drive along side them. Sweet and Ryder will automatically lean out of the window and shoot at them, but Smoke is determined to eat. If you have a gun, you can lend Sweet and Ryder a hand. Press the L2 and R2 buttons to look left and right, and shoot at the Ballas. Once the vehicle catches fire, the Ballas will flee. You can let Sweet and Ryder finish them off, or you can simply drive over them.
$200, Respect +
*After this mission you will recieve a phone call from Sweet. If you don't respect your body, ain't nobody going to respect you. Pack on some muscle at the local gym.
 |  |  |  |
| Nines and AKs |
Grove Street have no weapons. Other gangs have have Macs and AKs whereas Grove Street have nothing. Carl suggests visiting Emmet, but even Emmet aint got nothing, says Sweet. Emmet is with the Seville Boulevard Families, they aren't too close with Grove Street. Despite this, Smoke is willing to pay a visit with you. Drive to Emmet's with Smoke, and stop in the red marker. Emmet isn't the brightest of people. At first he thinks you are Brian Johnson, although he knows fine well that Brian was killed 5 years ago. Emmet has been serving the community for 30 years. CJ and Smoke aren't impresed when they see what Emmet has to offer, but it will do for now.
Time for a small tutorial. Watch Smoke blast a few bottles, and repeat his actions. The first level involves shooting whilst standing, and the second involves shooting whilst crouching. After all the bottles have been eliminated, use manual aim to shoot the gas tank on Emmet's car. Take Smoke back to his crib. Learn more about the weapons in San Andreas here.
*Sweet calls you on your cellphone. You must show your loyalty to the Grove by wearing Grove Street colours. Travel to the nearby Binco and enter the store. You don't actually need to buy anything, but it's worth having a look around. Learn more about clothes here.
Respect +
 |  |  |  |
| Drive-By |
Ryder is complaining to Sweet about how he is a better driver than CJ. CJ walks in unexpectantly and overhears the conversation. Sweet explains that Ryder is a great shootist, so we need CJ on the wheel. Ryder agrees, and the group head outside. Get in Sweet's car with your homies, and drive into Ballas territory to cause a disturbance. Stop in the red marker, and look at the on-screen instructions. There are a group of Ballas standing at the corner of the street. Concentrate on driving, and let the rest do the shooting. Drive alongside the Ballas and Smoke, Sweet and Ryder will automatically lean out of the car and shoot. Keep an eye on your vehicle's health meter. If it runs out, the car will blow up and the mission is failed. Use the L2 and R2 buttons to look left or right.
Once all of the Ballas are wasted, a new blip will appear on your radar. Waste another 4 sets of Ballas (the final group are in Glen Park) and you'll gain a 2 star wanted level. Head over to the Pay n' Spray shop in Idlewood, being careful as to not damage your vehicle. Drive back to the Grove to complete this mission. You're down with the Grove and Ballas know it, so watch yourself.
$500, Respect +
 |  |  |  |
| Sweet's Girl |
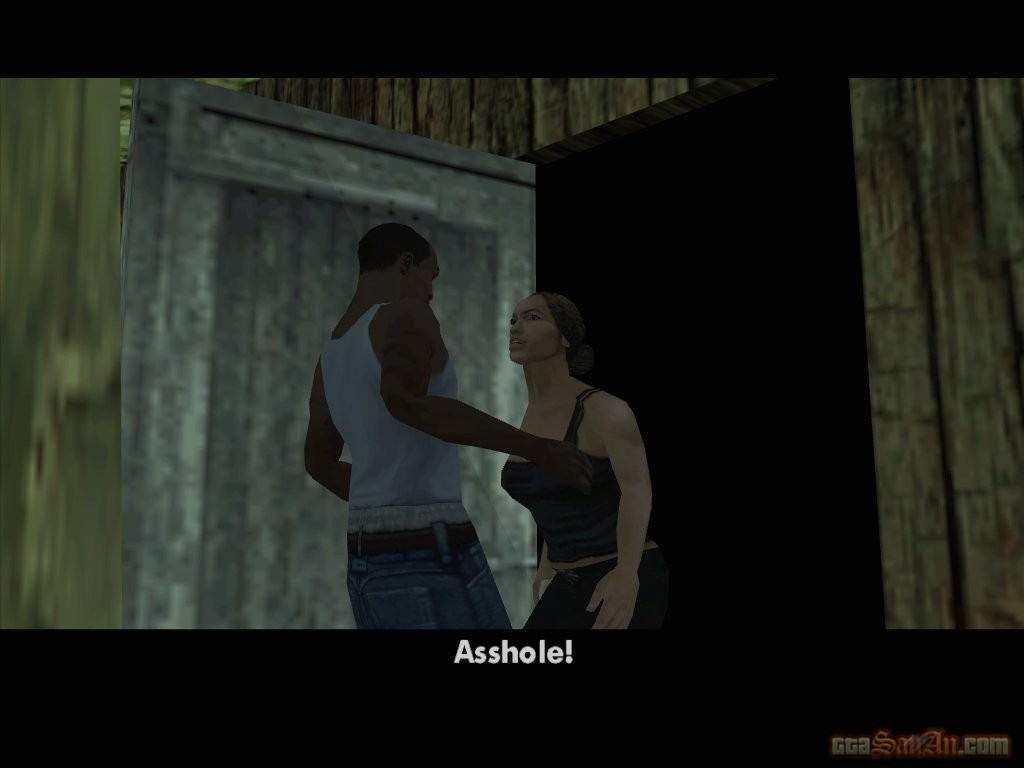
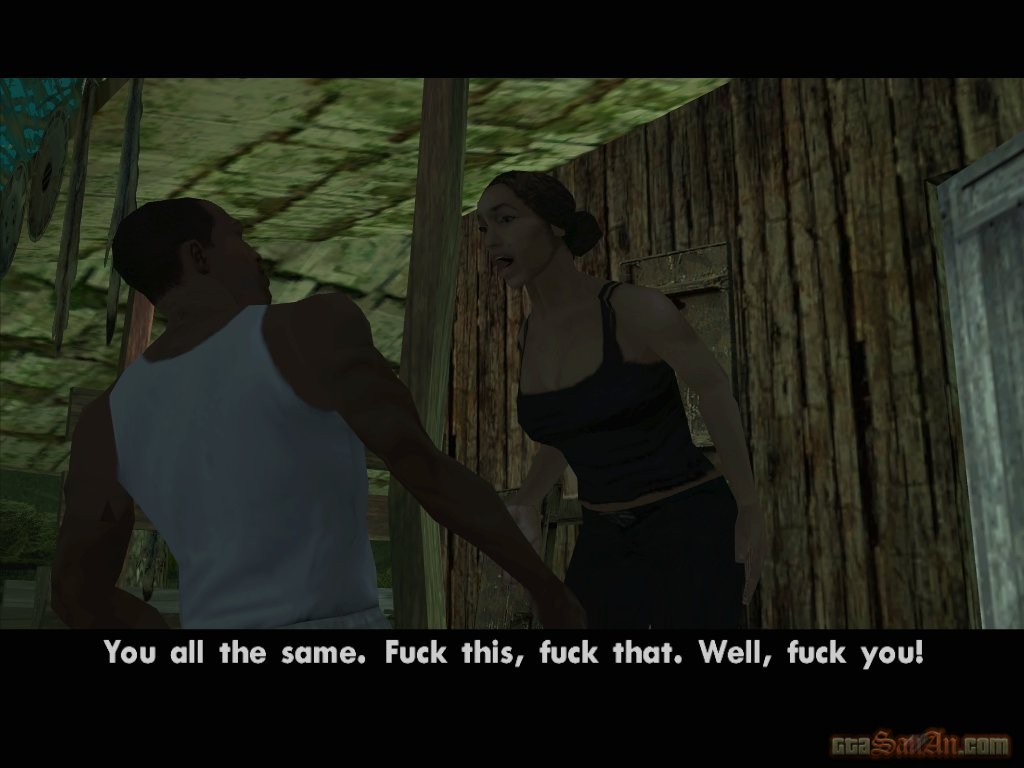
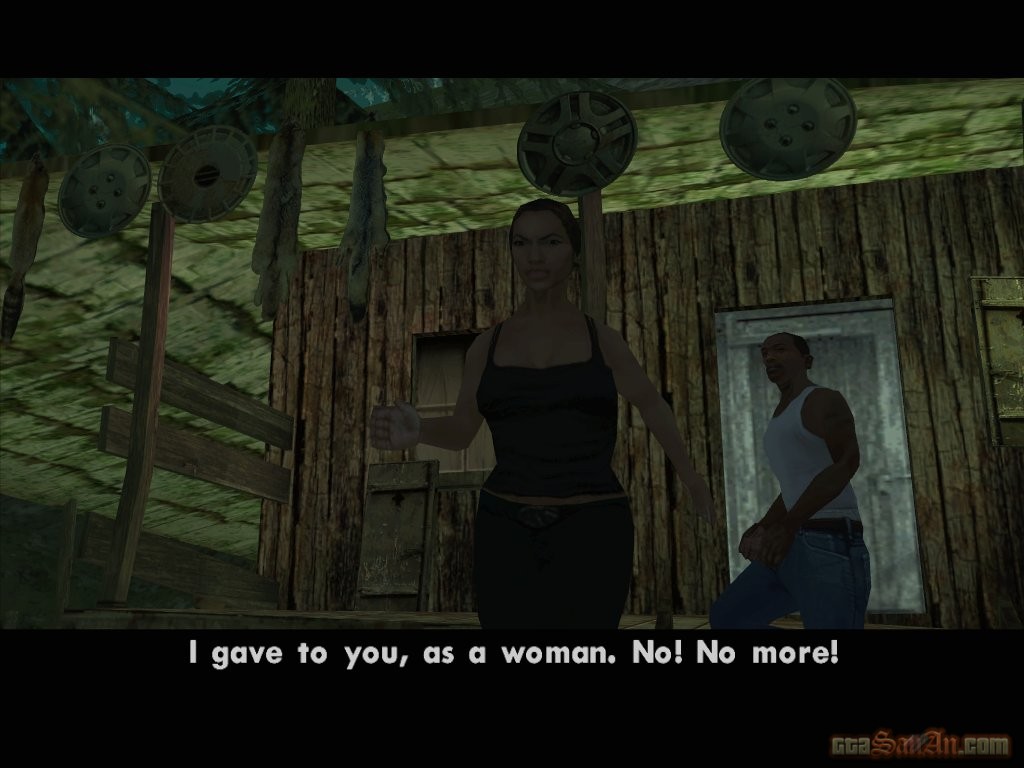
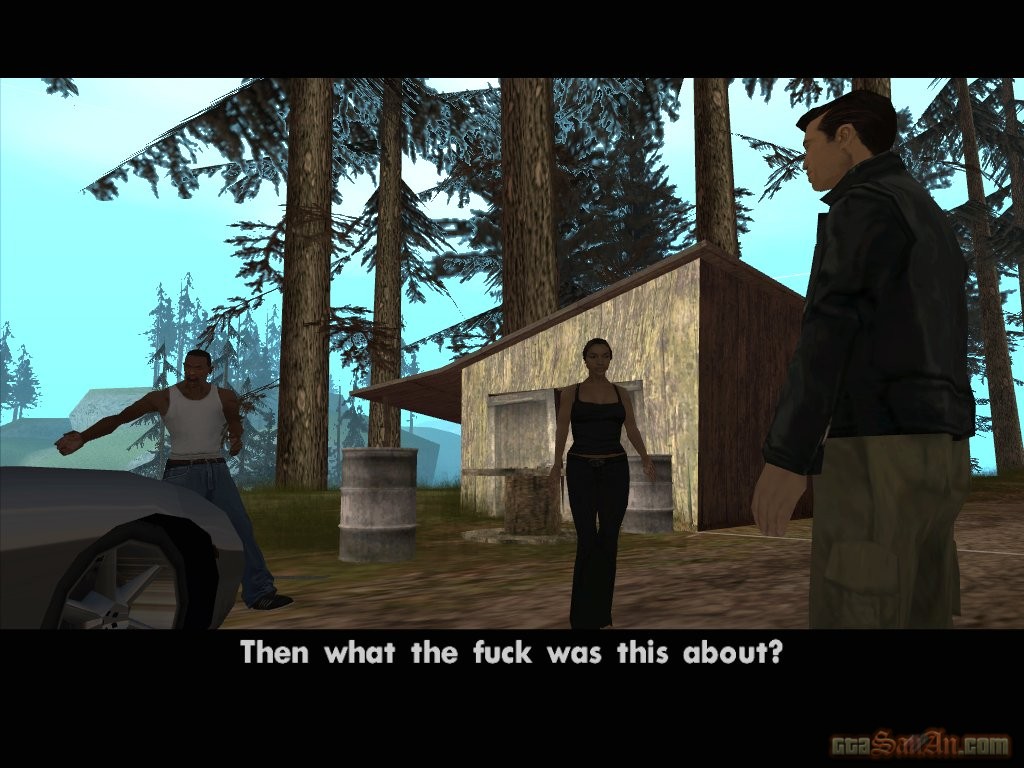
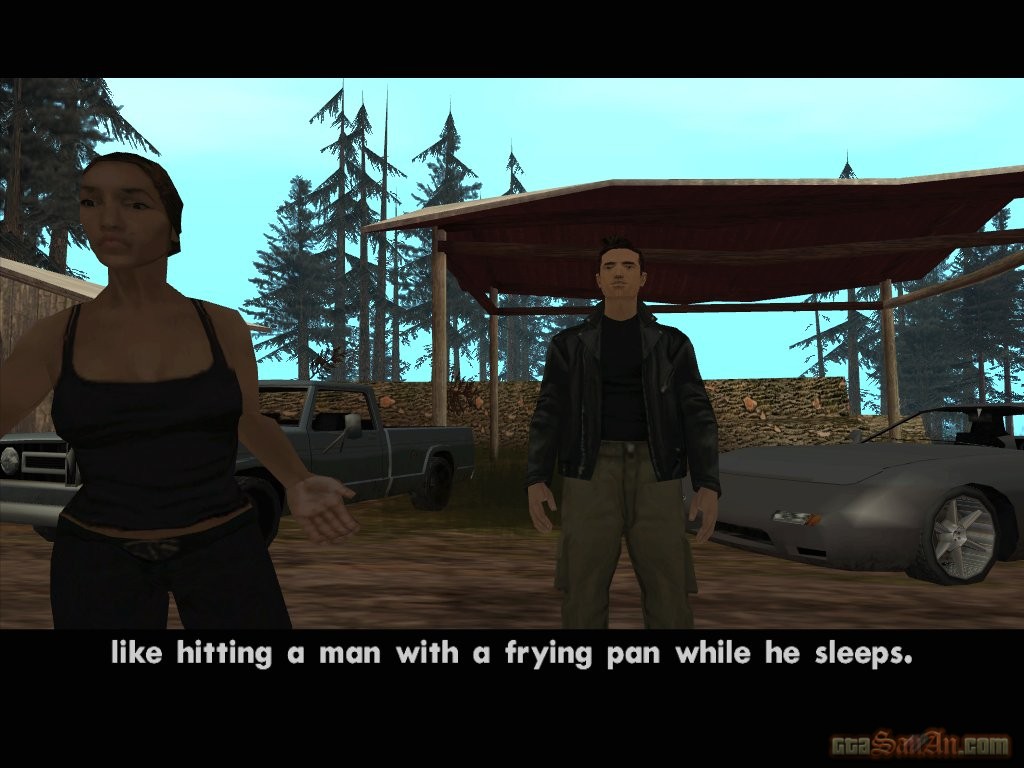
Carl enters Sweet's house, and calls his name. The house is completely empty - no sign of Sweet, Ryder or Big Smoke. When he leaves the house, Carl's cellphone starts ringing. It's Sweet, and he's pinned down at his girlfriend's house by the Seville Boulevard Families. Sweet and his girl need a ride out of there, fast. After the cutscene, Sweet's health bar will appear on-screen. You must get to Sweet and take out the Seville Boulevard Families before his health bar is empty. You can drop by Emmet's to get heated but if you already have a plentiful supply of ammo, there's no need.
When you arrive at the girlfriend's flat, Sweet is surrounded. Take those seville boys out! The easiest way would be to simply drive over them, but you'll need to exit your vehicle to take out the final enemy, who is standing on the steps. Once no Seville boys remain, Sweet rings you on your cellphone. Fetch a 4 door car to pick up Sweet and his girl. After the cutscene, 3 cars come speeding around the corner, and the Seville boys are preparing for a chase. Get Sweet and his girl safely back to the hood, to complete the mission.
Respect +
*You can now recieve missions from Ryder. Visit him between 12.00 and 20.00
 |  |  |  |
| Doberman |
This mission (and the next) is available later on in the game. Sweet calls to say that some base-head has been buying drugs from Glen Park and supplying them to your Grove Street brothers. He's hanging out with his new Ballas friends at the moment. Walk into the red marker at Ammu-Nation. If you need any weapons, now is the time to get them. Head over to Glen Park, which is higlighted in purple on the radar. This means that it is Ballas territory. Attack and kill at least 3 Ballas gang members (on foot) to provoke a gang war. The area now flashes red on the radar. You must survive 3 waves of attacks. Some of the Ballas will carry baseball bats, whilst others will cary powerful guns. Stand in the middle of the park so that you can see clearly where the enemy is coming from, and then if possible, shoot from a distance. Once you have killed the 3rd wave of enemies, the territory is yours and is now shown as green on the radar.
You have flushed the grass. He runs out of his house screaming 'Tenpenny set me up!' Kill him, to complete the mission. Winning territory will gain you respect and money. The money appears in front of your garage at Grove Street. However, don't spend too much time winning territory (unless you are really desperate for money) as the feature is disabled after 'Green Sabre', until the final missions of the game. Learn more about gang territory here.
Respect +
 |  |  |  |
| Los Sepulcros |
Tenpenny has informed Sweet that a funeral is taking place for a Ballas gang member that you shot down during the mission 'Drive-By'. All of the OG's will be there so Sweet wants to hit them all at once as revenge for the Ballas drive-by at Moms funeral. Recruit the two homies with the blue arrows above their heads -- they respect you enough to provide help. To do this, target them with R1 and press 'Up' or 'Down' on the D-pad. Get in the car with your gang and take them to the funeral. The plan is to go around the back of Los Sepulcros and sneak over the wall. You must get there within 4 minutes (4 gameplay hours). Drive to the cemetry before Kane arrives, and stop in the red marker. After the cutscene, climb the wall and approach Sweet and his men. Kill Kane -- do not let him get away! Once Kane is dead, kill any remaining Ballas and get in Sweet's car. Drive him home.
Respect +
 |  |  |  |

| Cesar Vialpando |
Once again, Sweet is arguing with his sister Kendl. Sweet doesn't like the fact that Kendl is dating Cesar of the Varios Los Aztecas, a rival gang. Sweet wants you to follow Kendl and check out Cesar, to make sure that she isn't making a huge mistake. When you have control over CJ, goto the garage in Willowfield. Sweet called ahead and asked his friend [who owes Sweet big time because of a past incident] to give CJ a car that bounces. Whilst in the car, backup into the garage. You now have a chance to modify your ride, although it isn't absolutely necessary. Press L3 to lock the car's hydraulics in place. Move the right analog stick to control the hydraulic suspension and press R3 to make it hop. Get to the lowrider meeting at Unity Station, El Corona. Drive into the red marker. You have 3 options: Increase Wager, Decrease Wager and Proceed. The minimum wager is $50 and the maximum is $1000. If you lose this contest, the money that you are betted will be lost to the opposition.
A series of directions will be shown across the screen. You must move the right analog stick in the direction shown, exactly as it passes through the circle on the middle of the screen. Try and not let the music put you off -- concentrate on the circle. For every bad move, points are added to the opposition. After successfully winning this contest, a short cutscene will take place. Kendl is delighted with your performance in the lowrider challenge, and Cesar introduces himself. Carl demands that he take his hands off his sister, but after some discussion, he agrees to give Cesar a chance. One of the Varios boys tries to pick a fight with CJ, but Cesar holds him off.
$ (the money that you betted)
*Big Smoke's missions are now available.
*Cesar calls, and asks if you'd like to make some extra money. He invites you take part in a lowrider street racing competition. Goto the marker in El Corona if you're interested.
 |  |  |  |
| High Stakes, Lowrider |
You need to be in a lowrider car for this mission. Choose one that doesn't contain hydraulics. Hydraulics increase the difficulty of this mission by a mile (if you accidently trigger the hydraulics while racing, the vehicle becomes difficult to control and may flip). Cesar and Kendl comment on your choice of vehicle -- very impressive, they say. Follow Cesar to the starting point of the race, and park in the red marker. Keep a close eye on the radar, and race through each of the red markers. If you look closely, each marker contains an arrow pointing in the direction of the next marker. To put it simple, the other racers are pathetic. There's no need to race full speed in this mission. Take your time, and you will make less faults (one fault can cause a huge amount of damage). When you reach the marker at the Santa Maria pier, keep your foot on the pedal and race full speed towards the end of the pier, to ensure a victory. You must finish in 1st place to pass this mission. (If you happen to lose this race, Kendl will make a very childish phone call)
» Map
$1000
 |  |  |  |

| Home Invasion |
Ryder seems anxious. He can't remember where he put "the water" in his back yard, so he's desperately scrapping about. He needs some before he "deals" with things. Ryder's homie LB tells him that an army guy (Colonel Fuhrberger) has all the weapons that Grove Street need. The plan is to rob Fuhrberger when its dark and he's asleep. After the cutscene, the time is automatically set as 22.00, and a boxville is placed outside Ryder's crib. Drive to Colonel Fuhrberger's, overlooking East Beach. Enter his house, and follow the on-screen instructions. You have a total of 8 minutes (8 game hours) to retrieve the goods and exit the colonel's house. A noise meter will appear, and you must remain silent at all times otherwise Furherberger will hear and call the cops.
There are various crates scattered across the house. Press 'Triangle' to pick up a crate, and 'Triangle' to release it again. Dropping a crate will cause noise. Once you have picked up a crate, exist the house and drop it into the back of the van. After you have at least 3 crates, get in the van with Ryder and offload the goods at LB's garage in Willowfield.
Respect +
 |  |  |  |
| Catalyst |
Ryder never did find his water, so he's cooking "a little something" something for himself. The C.R.A.S.H team (Tenpenny, Pulaski and Hernandez) make an unexpected appearance. Tenpenny and Pulaski mock Ryder. Tenpenny says he's got something for Grove Street. It'll be there in 5 minutes. Drive Ryder's truck to the ammo train and you will see that its surrounded by Northside Vagos -- looks like Tenpenny told every gang in the city about this train. Take out the Vagos, and a group of Ballas will enter the scene. Protect the train from the Ballas. Walk into the red marker at the rear end of the train. CJ climbs on, but Ryder follows in his truck as the train begins to move.
Your mission is to throw the ammo crates onto the back of Ryder's truck. You must throw 10 crates within a minute and a half. Move the left analog stick left and right to direct your throw, hold L1/Circle to power your throw, and then release. You can also move the left analog stick up and down to increase/decrease your throwing distance. Once Ryder has 10 crates, you will gain a 3 star wanted level. Make your way to the Pay n' Spray in Idlewood, to lose the heat. Get back to the Grove -- LB's coming over to stash the goods.
» Map
Respect +
 |  |  |  |
| Robbing Uncle Sam |
Ryder is stoned out of his mind. He asks CJ a question: Why did he (Ryder) drop out of high school? CJ believes its because he put hands on the teacher that was wearing Ballas colours. The real answer is, he's too intelligent. Ryder goes onto explain that the army have all the guns they need. Get in the van with Ryder and drive to the compound at Ocean Docks. (For sake of interest, LB parked the van outside Ryder's house. He's very dependable. Like a clockwork ninja!) A car is seen driving into the compound. After the short cutscene climb over the wall and kill the guard. Shoot the lock and allow Ryder to drive in. There's another guard over by the warehouse. Get rid of him, and shoot the lock on the warehouse. Destroy the 2 guards, and get in the forklift. 2 new items are displayed on-screen -- Ryder's health bar, and the number of boxes collected.Position the forklift in front of one of the crates, and raise the box using the right analog stick. Place the boxes in the back of the van by simply driving into it.
Collect all 4 boxes inside the warehouse, and then the 2 outside. If you hear shooting whilst collecting the boxes, get out of the forklift and protect Ryder. He isn't very reliable, and his health will run out quickly. Once all 6 boxes have been obtained, get back in the truck. Ryder climbs into the back, and 2 cars begin chasing. Make your way to the lockup in Willowfield. Sound the horn (R3) and Ryder will throw an exploding crate at the chasers.
Respect +
 |  |  |  |

| OG Loc |
Smoke and Sweet are joking about Jeff.. I mean er, OG Loc, who is to be released from prison today. Drive Smoke and Sweet to pick up Jeffrey. Park in the red marker to trigger the cutscene. Loc walks out of the building, and towards the Grove Street OG's. Loc explains that he has to kill somebody who was dissing him in prison. Drive to freddy's house, in Vagos hood. Stop in the red marker. Sweet and Smoke leave, but Carl decides to stay and help Loc. Stand in the red marker at the top of the stairs, to ring the doorbell. After a short discussion, freddy escapes via the back door, and hops on a bike. Chase and kill freddy!
Grab the bike in front of you, and keep up with freddy. Loc will shoot from the back, but he won't perform very well. Freddy stops at several locations to allow you to catch up, so there's no need to rush. After a long chase through Los Santos, freddy will stop at the basketball court across from the Ganton Towers, where a group of Vagos are waiting. Leave no survivors. Take Loc to his new place of work -- the Burger Shot in Marina.
Respect +
* OG Loc's missions are now available. See him at the Burger Shot in Marina.
 |  |  |  |
| Running Dog |
Carl is surprised to find that Tenpenny and Pulaski have paid a visit to Big Smoke's house. Smoke says they won't leave him alone but quickly changes the subject. His cousin is moving in from Mexico, and he must pick her up. Get in Smoke's car, and drive him to the meet. If you need a weapon, drop by Emmet's. During the journey, Carl discovers that, as per usual, Smoke is talking out of his ass. Cousin Mary is infact his weed supply. Stop in the red marker, and Smoke begins talking to some Vagos dealers. They clearly tell him to f--- off. Smoke, angered, gets out of the vehicle and whacks one of them with a baseball bat. The other makes a run for it, climbing several fences whilst doing so. CJ and Smoke follow, but Smoke is too fat to continue! Hunt down and kill the gang member, to complete the mission. You can climb walls using 'Square', and sprint by holding 'X'.
Respect +
 |  |  |  |
| Wrong side of the Tracks |
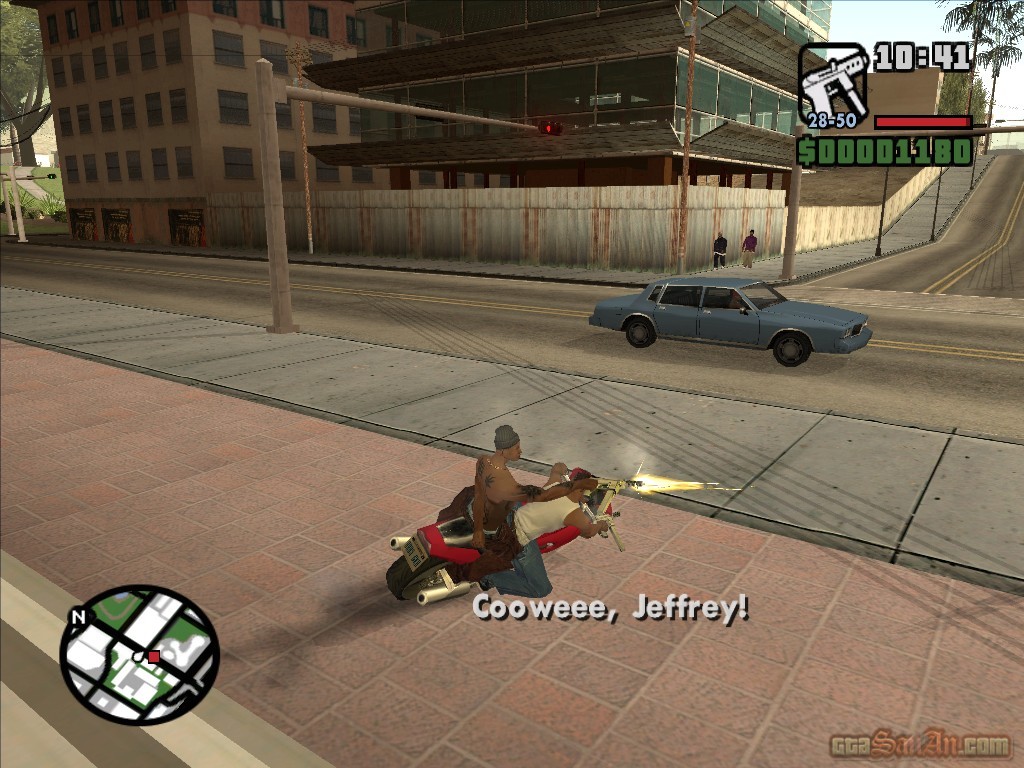
Once again, Tenpenny and Pulaski are spotted leaving Big Smoke's house -- this time through Smoke's garage. They seem increasingly interested in Big Smoke. Smoke knows about something that might put Grove Street "deeper in the game." Drive Big Smoke to Unity Station, and stop at the red marker. You're looking for some Vagos cats meeting with the San Fierro Rifa, cutting some kind of deal. The meeting is taking place on the roof, but unfortunately, the Mexicans see you. They hop onto the roof of the train, and off it goes. Get on the motorbike wth Big Smoke, chase down the Vagos gang members and take them out! Keep up with the front carriage of the train so that Big Smoke can shoot the Vagos. Don't drive too close to the train otherwise Smoke will shoot the train itself, and not the Vagos! -- stay as far to the side of the train as possible.
As the train passes Idlewood, a car is seen parked at a crossing. The train continues going at full speed, and the car explodes, so make sure you avoid it. Watch out for the oncoming train as you enter the tunnel at East Los Santos, leading into the countryside -- move to the right of the oncoming train, and stay off the track for a bit. CJ is still forbidden to leave Los Santos, so you can't let the train get any further than the Frederick Bridge. Once all of the Vagos gang members have been destroyed, take Smoke back to his house.
» Map
Respect +
 |  |  |  |
| Just Business |
Smoke is going downtown, and he wants you to go with him. As usual, CJ is down. Take Big Smoke to downtown Los Santos, and stop in the red marker. Smoke tells you to wait outside, but to come in if you hear any shooting. Seconds later, Big Smoke is heard screaming. Go inside! The russians are attacking Big Smoke. Shooting whilst you are crouching improves your accuracy. Kill all of the russians in the building, and follow Big Smoke to the exit. There are more russians outside, leave no survivors. Smoke jumps on a motorbike, with Carl on the back. A health bar for the motorbike appears, and some russians begin to chase. To look around on the bike, use the left analog stick and to fire, press 'Circle'. Aim for the russians, not the bike. The bike would eventually catch fire and explode, but it is much quicker and easier to shoot the russians off of the bike.
A truck enters the scene, and also follows. The truck is bulletproof and will not explode, so don't waste time shooting at it. Smoke drives into the Los Santos flood control trench, where the rest of the chase will take place. More bikes follow -- take out all of the russians. Smoke drives over two buses linked together, and the truck hits another bus, sending it off course. There's two road blocks up ahead, so shoot down all the russians and their vehicles. Another two bikes enter the scene, aswell as two cars. Begin by shooting the russians off of the bikes, and then target the cars tires, before blowing them up. More bikes follow, and the truck re-appears, making a spectacular jump over the bridge. In order to lose some of the heat, Smoke drives up a ramp, but 2 more bikes appear behind. Continue shooting at the russians and protect your bike. A cutscene begins, and Smoke drives up the back of the truck. Suddenly, every vehicle belonging to the russians explode. There's an old sewer up ahead, that Smoke drives through. Russians continue chasing from behind. Smoke manages to lose the chasers, and decides that it is best to split up.
Respect +
 |  |  |  |

| Life's a Beach |
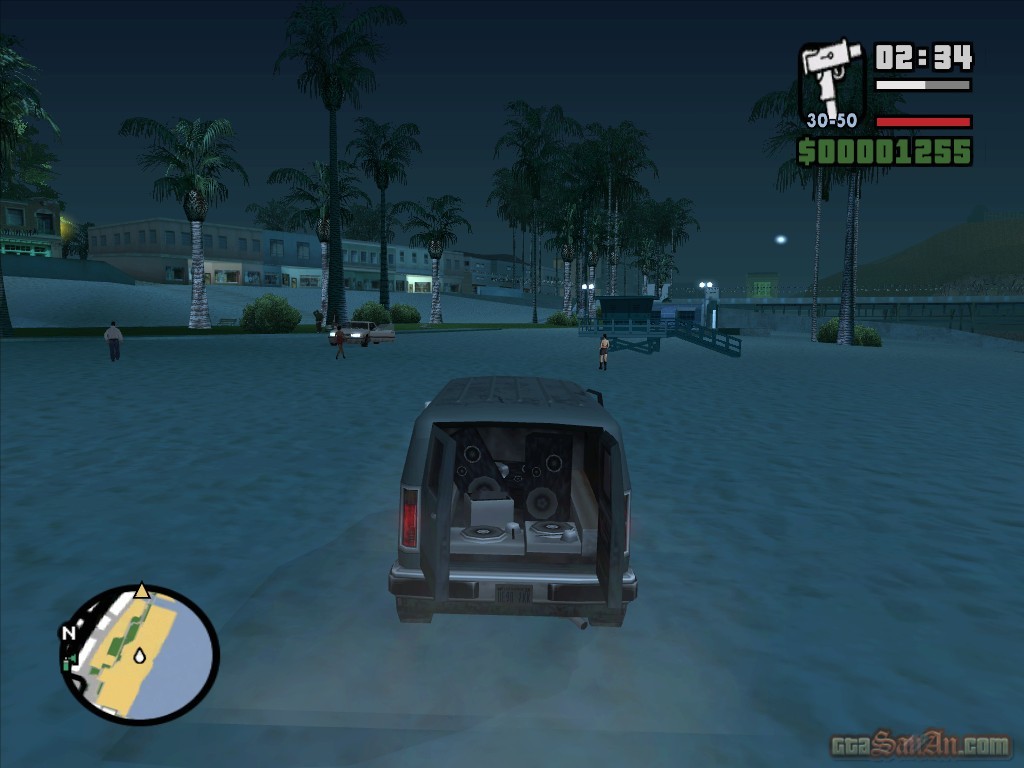
Loc needs a sound system, and he saw one cruisin' through the drive-thru earlier on. He says it was heading towards the Santa Maria beach. Goto the beach party! When you get to the beach party, go and talk to the DJ. She asks you to dance, and you must reply positively. Press 'Right' two times to begin dancing, and don't shoot at anybody or you will disturb the beach party and the mission is automatically failed. You must get a score of 4000 or greater to gain access to the sound van. Just like the mission 'Cesar Vialpando', you must press the buttons shown on-screen just as they pass through the circle on the middle of the screen. If you win, the DJ invites you into her van. CJ throws her out of the van and speeds off. She begins shooting, so make a quick getaway. Follow the blip on the radar and get the van back to the garage. During the journey, two cars from the beach party will chase. Don't bother shooting at them but instead keep focused on the blip on the radar.
Respect +
 |  |  |  |
| Madd Dogg's Rhymes |
Loc is cleaning the floor at the Burger Shot. He begins singing to himself. Somebody walks out of the toilet and says that his rapping sucks. Carl enters and asks Loc if he has ever thought about getting a writer to help. Loc starts talking about Madd Dogg's rhyme book, from his home in the hills. He wants you to steal Madd Dogg's rhyme book, but Carl is unsure at first. Go to Madd Dogg's mansion -- the main door is around the back. The rhyme book is in Madd Dogg's recording studio, represented by the blip on the radar. However, it's not as easy as it looks. Madd Dogg's personal security are patrolling the mansion, so do not use any guns on your way to the rhyme book or you will alert them. You must use stealth to steal the rhyme book. The first guard (red blip on the radar) cannot see you as he facing the other way. This means you can sneak up behind him with a melee weapon and perform a stealth kill. The red blips on the radar point in the direction that the guard is facing. Perform the stealth kill by moving slowly towards the guard and pressing 'Circle' whilst targeting with the knife. The second guard is patrolling the swimming pool area. Observing his route will allow you to work out how to get past undetected. There are lots of shadows in this area to hide in. Hiding in shadows makes it difficult for the a guard to spot you. When you are in a shadowed area, your blip turns grey on the radar.
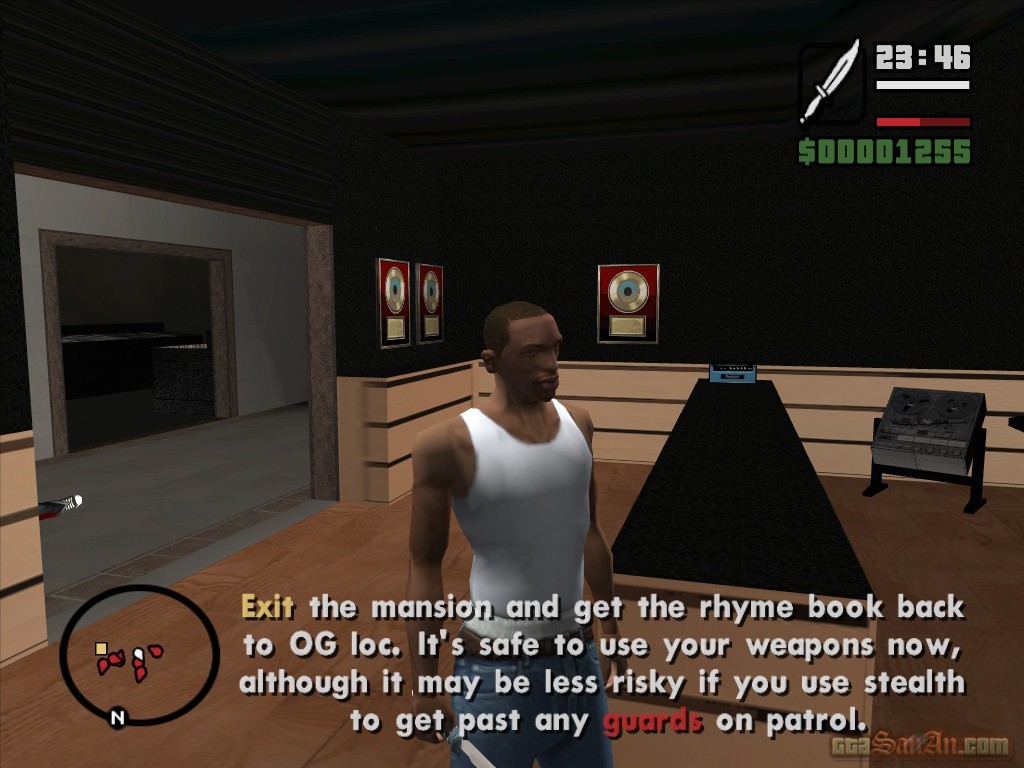
Continue walking towards the rhyme book. Another guard is coming, so move into the shadowed area towards the left. When he is facing the opposite direction, crouch and sneak up behind him to perform a stealth kill. Move into the bar area, where one of the guards happens to be playing Driv3r, and makes reference to Tanner. It is not possible to perform a stealth kill on the guard behind the bar, so crouch and walk by the bar so that he doesn't see you. Pick up the rhyme book when you reach the recording studio. More guards spawn, but it is now okay to use your weapons, although, it would be easier if you continued using stealth. The guards use silenced pistols, so if you kill one be sure to collect it and you can fire the other guards without making a noise. Leave the mansion the same way you came in, and grab the mountain bike outside. Take the rhyme book back to OG Loc.
Respect +
*Officer Tenpenny phones. How did he get your number?! He asks you to meet him at the donut place in Vinewood. He's got a couple of jobs for you.
 |  |  |  |
| Managment Issues |
See Loc between 12.00 and 05.00. The Appliance Technician at Burgershot called in sick, so Loc got promoted. He's cleaning the frier just now. Loc is unhappy. Dogg's manager has been pressurising him, and telling everybody that Loc is whack. Loc wants you to kill him. He's attending some kind of awards ceremony and thats the only time he leaves Dogg's side. One of Madd Dogg's managers drivers is eating at the Burger Shot across town. Go and steal his car and meet the other drivers before 10PM. During your journey to the Burger Shot, Loc phones to tell you that the chauffeur has left the restaurant and is heading towards the awards ceremony. Damage the car to scare the driver out, and run him over. Get in the car, get it repaired at the nearest Pay n' Spray, and meet the other drivers. Park the same way as the other drivers in the red marker. They get in their cars. You must keep in the middle of the other two vehicles whilst driving to the awards ceremony.
When you reach the ceremony, Dogg's manager will get in your car with his bitch, and ask you to take him back to Dogg's mansion. But not this time -- the only place he is going is under the ocean. Put your foot on the pedal and race down to the Santa Maria pier. Be careful as the other drivers will follow and attempt to ram you off the road. Go full speed towards the end of the pier and bail before it reaches the end. Watch the cutscene as Madd Dogg's manager faces a watery death!
Respect +
 |  |  |  |
 |  |  |  |
| House Party |
Loc quits his job as Appliance Technician at the Burger Shot -- apparently it's not gangsta enough. If he's going back to prison, he wants a big ass party first with lots of nice bitches. The house party will take place at OG Loc's house in Grove Street at 8PM and it will finish at 5AM. Although its not necessary, you are told to get some new threads and a haircut. Loc phones later on to tell you that they got some girls for the party. He invites you to join them. Go between 20.00 and 06.00. When you arrive at the party, Loc is rapping, terribly, might I add.
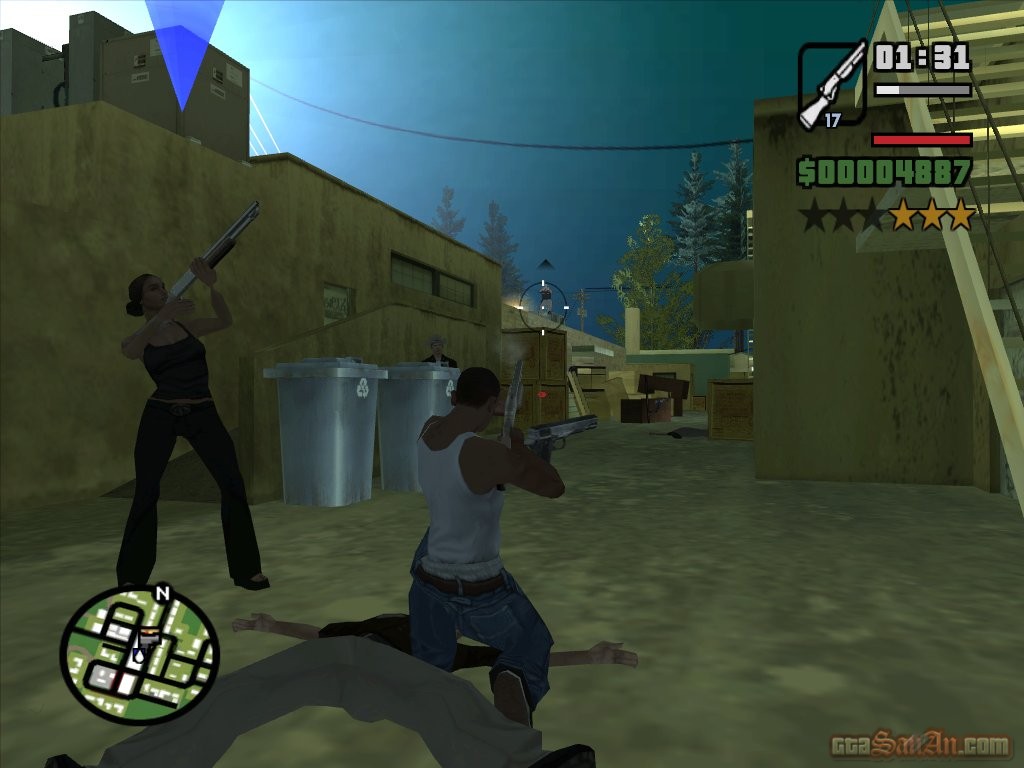
CJ meets up with Ryder and they go outside to avoid the awful music. Outside they meet Sweet and the rest of the gang. One of your homies cycles down the street and warns you of a Ballas posse heading towards Grove Street. Sweet asks that 2 cars block the road. Ryder calls for backup whilst the others get heated. Kill the Ballas and protect Grove Street! Soon after, more Ballas will appear on the bridge above. If you have a rocket launcher, now is the perfect time to use it. If not, cap them one-by-one with whatever weapon you have. Sweet orders you to cover the alleyway. The Ballas enter Grove Street from all directions, so watch your back. Once all of the Ballas are eliminated, Sweet shouts 'GROVE IS KING!'. They go back to enjoy the party.
Respect +
 |  |  |  |

| Burning Desire |
The C.R.A.S.H. team are waiting at the donut shop in Vinewood. Tenpenny calls Carl over, and offers him a seat. CJ says he couldn't visit earlier because he was busy. Pulaski thinks CJ is screwing with them, and Tenpenny makes it perfectly clear that they own him. He then goes onto explain that there's a gang-banging cop-killing thug like yourself holed up across town. Pulaski hands you the address. Your job is to make sure that he doesn't leave the neighbourhood alive. Tenpenny has hidden some molotovs in an alleyway in Downtown Los Santos -- pick them up. You can use the cop car parked in front of the donut shop to get there. Once you have collected the molotovs, goto the Vagos gang house and torch it. Kill the gang members standing in front of the house. Throw molotovs into the downstairs windows, each marked with a red arrow. Press and hold 'Circle' to throw a molotov. Hold 'Circle' longer to throw longer distances, but make sure it doesn't bounce back towards you. More Vagos will attack as you torch the house, so be prepared -- 2 will move in from the west when you are at the back of the house, and there is 1 or 2 towards the east.
You soon discover that a girl is trapped inside, and she is choking because of the dense smoke. Go inside the Vagos Gang House and save the girl before her health bar runs out. Go into the kitchen and collect the fire extinguisher. Then go up the stairs and use the fire extinguisher to put out the flames seperating you and the girl. After the short cutscene, the girl will follow you wherever you go. The roof collapses, and the house is beginning to fall in. Extinguish any flames blocking the exits, and ensure that the girl gets out safely. Hold R1 for better aiming with the fire extinguisher. Once you leave the house, the girl thanks you, gives you a kiss and introduces herself. Give her a ride home. Her name is Denise Robinson and she is now your girlfriend.
*Completing this mission re-opens the Sweet mission strand. Sweet calls to say that somebody has been buying drugs from Glen Park and supplying them to your Grove Street brothers. He wants you to mess up Glen Park real good so that he'll lose nerve and flee. Stop by Ammu-Nation and get heated.
 |  |  |  |
 |  |  |  |
| Gray Imports |
The C.R.A.S.H. team are leaving the donut shop just as Carl is about to enter. Tenpenny says that he loves seeing gangs do his job for him, blowing each others brains out and such. So when one gang has a strong advantage over the other, that worries him. The Ballas, according to Tenpenny, have a very unfair advantage. They have brains, they're watching the news, cuttin' deals and so on. He tells you to check out a busy freight warehouse down at the docklands, to see what he's talking about. Goto the docks where the Ballas and the Russians are making a deal. Stop in the red marker. The Russians and the Ballas are holding a meeting inside the warehouse. Use the door shown in the cutscene to get inside.
Enter the compound and begin by shooting the explosives on the forklifts, causing the forklifts to explode. Eliminate all of the Russian guards, and walk to the entrance. Shoot the lock to open the door, and kill the Russians inside. Follow the red blip on the radar to locate the Russian Arms dealer. There are Ballas and Russians everywhere so stay low and watch your back. The arms dealer is inside the office at the top of the stairs, but he'll make a run for it as soon as you go up. It is unlikely that you will kill him before he gets in his car, so grab the motorbike and give him a chase. You can shoot forwards on the bike or from the sides by looking left or right (L2 and R2). Make sure he doesn't escape.
 |  |  |  |

| Reuniting the Families |
See Sweet between 09.00 and 17.00. Ryder, Smoke and Sweet are watching a porno when Carl enters the room. Sweet tells them to switch the television off and listen up. It's time to make things final -- no more base on the streets, it's ruining Grove Street. There's a meeting being held at the Jefferson Motel, where all of the families will try and settle their differences. Get in the car and take the crew to the meet. Stop in the red marker. Sweet explains that its strictly one representetive per set, so he's going in alone.
Sweet enters the motel, and an LSPD chopper heads towards the building. Two SWAT vans appear and a shootout begins. Smoke and Ryder flee, but CJ is determined to get his brother out of there safely. Nevermind the action thats going on outside. Go inside the building, and kill any attackers at the entrance. Walk towards the stairs, and CJ will ask a dying gangster where Sweet is. He says that they were meeting in the back someplace. [You can purchase drinks at the vending machines to replenish your health.] Go up the stairs and follow the blue blip on the radar. A SWAT cop appears from around the corner, and another as you turn left. Leave no survivors. (On a slightly unrelated note, if you enter the first room on the left, a girl will kiss you). Goto the end of the corridor and take out all of the SWAT cops. There's armor at the top of the stairs if you need any. Go down the second hallway and finish off any remaining cops. Go into the room and talk to Sweet, you need to get out of here fast.
CJ and Sweet are now on the roof of the motel, and another LSPD chopper appears. Sweet's health bar appears on-screen. Shoot down the chopper (with a rocket launcher, if you have one) and protect Sweet. Follow him down the stairs. Smoke and Ryder re-enter the scene. Get in the car and Smoke hands you an AK. To look around the car use the left analog stick, and to fire press 'Circle'. Shoot off any police cars (aim for the tires first, and then the body of the vehicle), and some police bikes will begin to follow. Aim for the officers on the bike, not the bike itself. The cops on the bikes jump onto the car, and start punching you. Get rid of them. The AK gets jammed, and no longer works. Smoke takes a right turn, and a chopper has its blades pointed towards the ground, creating an unstoppable barrier. One of the bike cops remains on the front of the car. Smoke drives full speed towards the chopper, and the cop is sliced up by the blades. The brakes are now jammed, and the crew bail from the car is it goes flying through a billboard and onto an articulated truck, causing a massive explosion. Everybody splits up.
Respect +
 |  |  |  |
 |  |  |  |
 |  |  |  |
| The Green Sabre |
It's time to show the Ballas what banging is all about. Sweet motivates the homies, and publicly thanks CJ for getting Grove Street back on its feet. Sweet orders everyone to get heated, and meet him under the Mulholland Intersection. CJ leaves the house, and Cesar calls. He says that its very important, and that you must see it now. Go and meet Cesar under the freeway northside of Verdant Bluffs. Walk into the red marker, and then go inside the car with the tinted windows down the alleyway. Inside the car, Cesar and CJ look across the street, as some Ballas exit a garage, followed by Ryder and Smoke, and finally Officer Tenpenny. Pulaski reverses the green sabre out of the garage. Yes, the same green sabre that was used to attack Grove Street when CJ's mother was killed. Smoke sold you out. Suddenly, CJ remembers about Sweet and orders Cesar to get Kendl to a safe place. Sweet and the homies are clearly running into a trap. Race over to the underside of the Mulholland Intersection before Sweet's health bar runs out.
Walk into the red marker. Sweet is injured, and can't continue shooting. Hold off the Ballas until the police arrive. More Ballas appear in a van, and more follow in cars. Leave no survivors. Eventually, 3 police cars arrive, and there's nothing you can do except watch. CJ is inside a police car, with a bag over his head. It is removed, and you discover that you are in the middle of nowhere with Tenpenny and Pulaski. Tenpenny reveals that Sweet is alive and inside a prison hospital being treated for gunshot wounds, but for now, Pulaski has a job for you. CJ is still trying to get over the fact that Smoke betrayed him. Smoke does what he's told, says Pulaski. Tenpenny orders you to stay away from C.R.A.S.H. and Smoke. There's a guy hiding up Mount Chiliad who disagrees with Tenpenny and Pulaski's methods. Pulaski wants him dead, and he wants evidence from you that he isn't going to talk.
» Map
 |  |  |  |
 |  |  |  |
A break from Los Santos...
| Los Santos is too dangerous at the moment, so it's time to take a break. From this point forward, you will not be able to provoke gang wars (or defend your own territory) and you cannot collect earnings from the Johnson House. These features re-open towards the end of the storyline. For the time being -- Ballas control Grove Street (and a majority of Los Santos), Sweet is in prison, Ryder and Smoke have betrayed you, and Tenpenny requires another favour. The next set of missions are based in the countryside (Flint County and Red County) where you meet characters such as The Truth, a crazed hippie, and Cesar's cousin Catalina. |

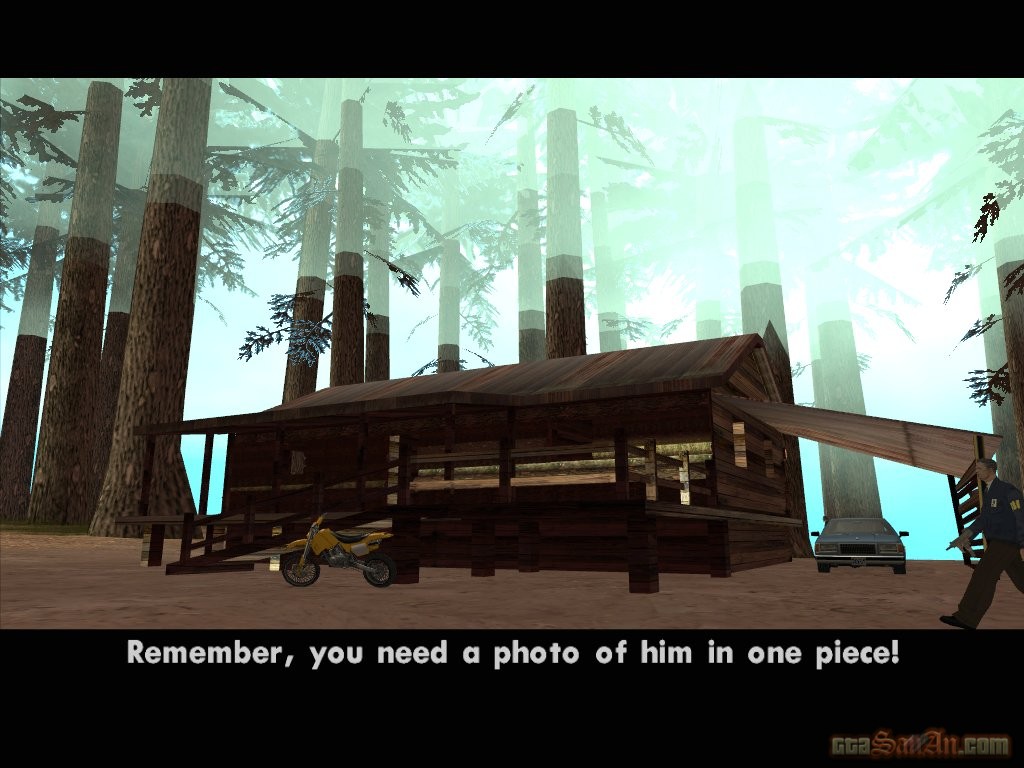
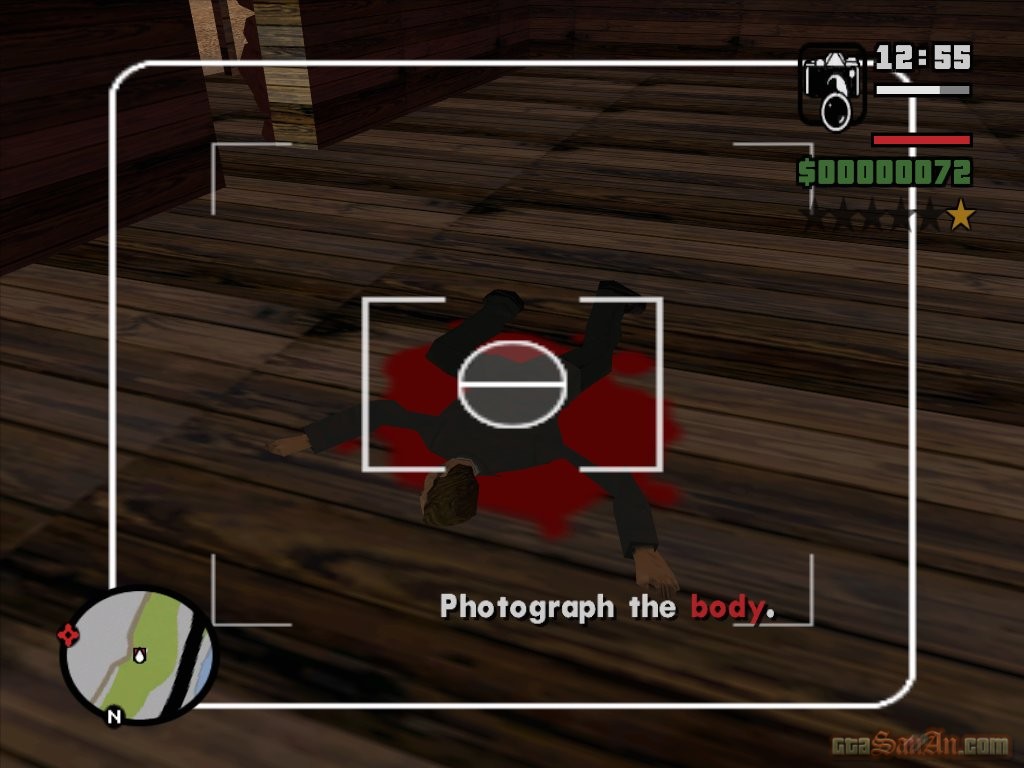
There's a guy hiding up Mount Chiliad that disagrees with Tenpenny and Pulaski's methods. Pulaski wants him dead, and he wants evidence from you that he isn't going to talk. Kill the witness, and bring back proof. Pulaski hands you a camera with an ulimited number of shots. Hold R1 to look through the camera viewfinder. Press L2 to zoom in, and R2 to zoom out. Press 'Circle' to take the photo, or press L1 to take the photo AND save it to your gallery. Grab a vehicle and head towards Mount Chiliad. Stop in the red marker at the bottom of the mountain, and begin making your way up. A bike (of some sort) would be the most suitable vehicle to use. The roads going up the mountain can get very narrow and complicated, so a small, but fast vehicle such as a motorbike would be perfect. Don't get too close to the snitches hideout, or he'll flee. Remember, you need a photo of him in one piece, so you can't just blow him up with the rocket launcher. Examine the area. There are feds surrounding the hideout, and the snitch is inside. Ignore the feds completely, there aren't many of them, and they can't do too much damage. Drive full speed towards the hideout. Go to the right hand side of the hideout, and round the back (still ignoring the feds, as they shoot). Pick a weapon and kill the snitch, who should at this point be leaving the hideout. If you can kill him before he gets into his car (which is the whole point of this method) you shouldn't have too many problems. If he DOES manage to get into his car, you will have to chase him down the mountain. Try and ram his vehicle over the edge of the mountain, but if thats not possible a simple drive-by should do it, causing the snitch to exit the vehicle, and from there its pretty straight-forward. Photograph the body, and take it back to the drop. *Cesar calls, and explains that Los Santos is very dangerous now. He's got backup coming out to protect you -- his cousin, really intense. Meet them at the diner in Dillimore, over in Red County (follow the question mark "?" on the radar)
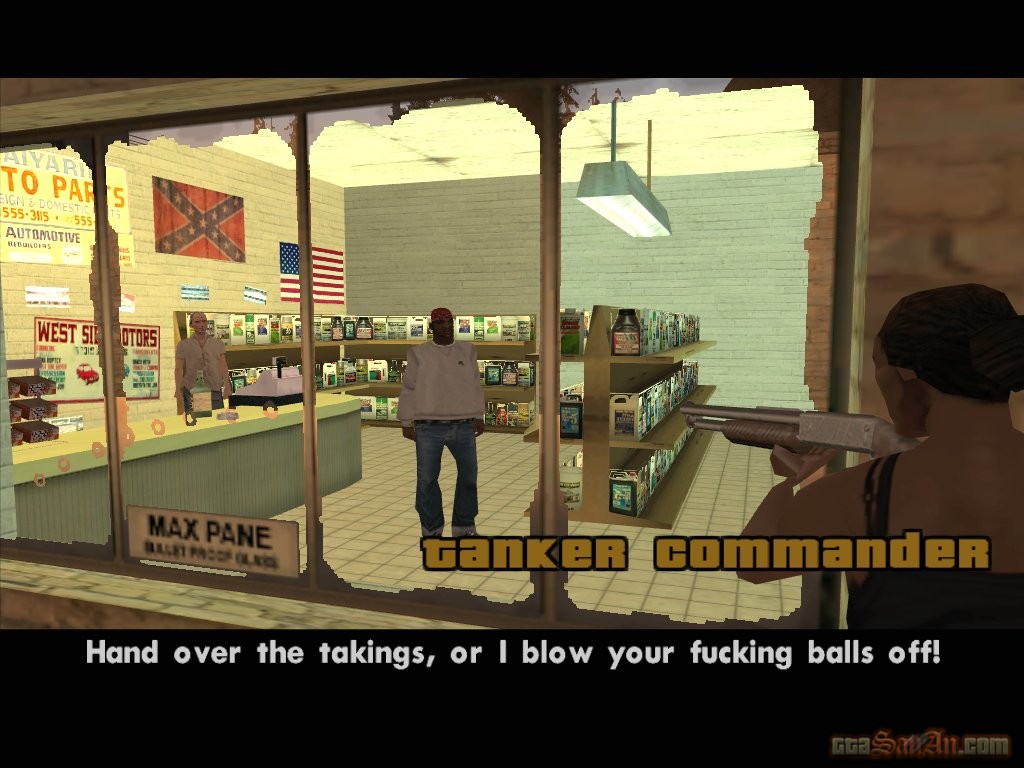
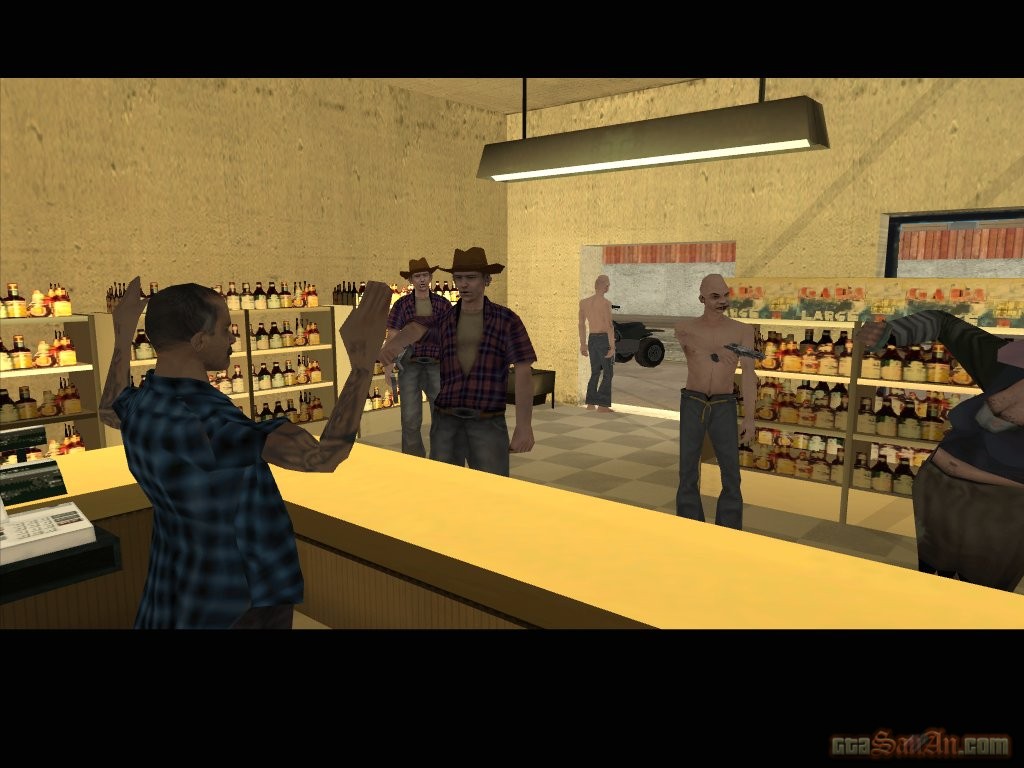
This is not really a mission, but more of an introduction to Catalina. Goto the diner in Dillimore, marked with the question mark "?" on the radar. Walk into the red marker to trigger the cutscene. You will see Catalina, the same Catalina we saw in GTA3. She is causing a disturbance, as always. Grab a vehicle, and listen as Catalina explains your mission(s). She wants to take Red County for every cent its worth, so she has set 4 targets -- a liquor store in Blueberry, a bank in Palomino Creek, a gas station in Dillimore and a betting shop in Montgomery. Each of the targets is marked with a green dollar sign ($) on the radar. You're the driver, so you pick which one to do first. The gas station is only just around the corner, so that would be the sensible choice. Scroll down to the mission 'Tanker Commander' for further details.
This isn't really a mission, just a cutscene with Cesar and CJ. Watch this cutscene by walking into the red marker at the trailer in Angel Pine. Cesar and Kendl are inside, and it seems they arrived safely. Cesar is very angry. He wants to go back to Los Santos to cap some dope dealers and explains that the only reason he came out here was for Kendl's safety. Cesar makes it clear what the problem is -- Big Smoke, Tenpenny and Pulaski. CJ, still trying to get over the fact that Smoke betrayed him, defends Big Smoke. Kendl jumps in and criticises Carl's words. Cesar goes onto explain that Smoke sends a car out to San Fierro, and the trunk comes back full of drugs. CJ is going to keep an eye on the highway to San Fierro, and see if he can see anything. *Catalina calls and complains about the lack of attention you have been paying towards her. Go and see her, you have got banks to rob.
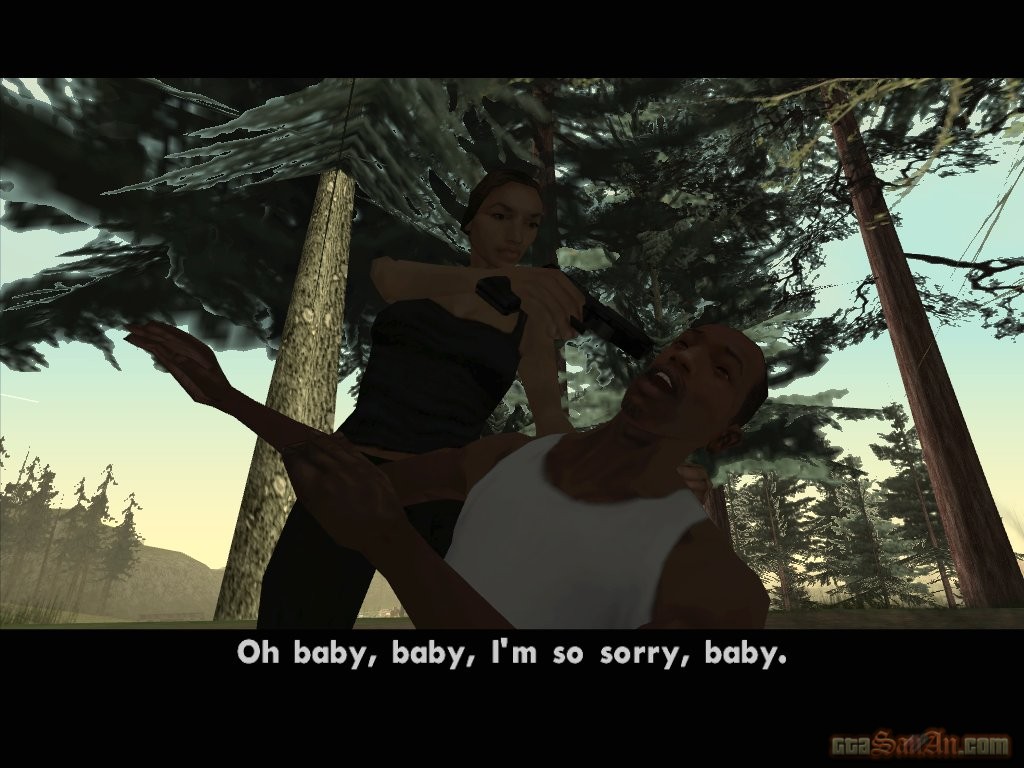
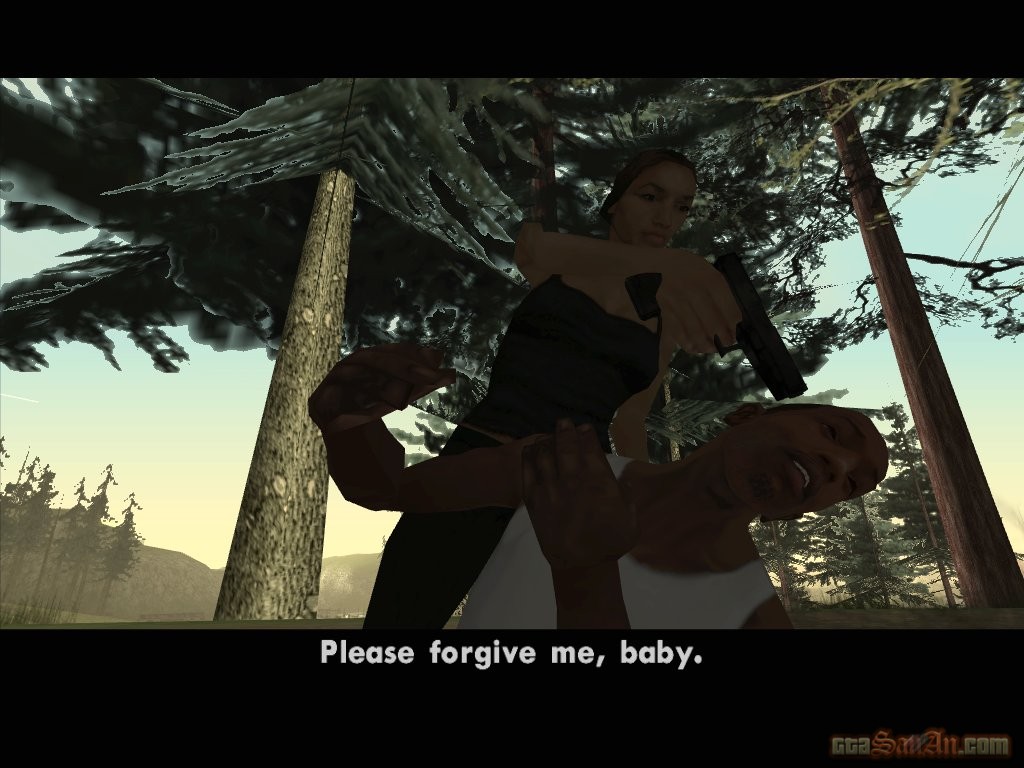
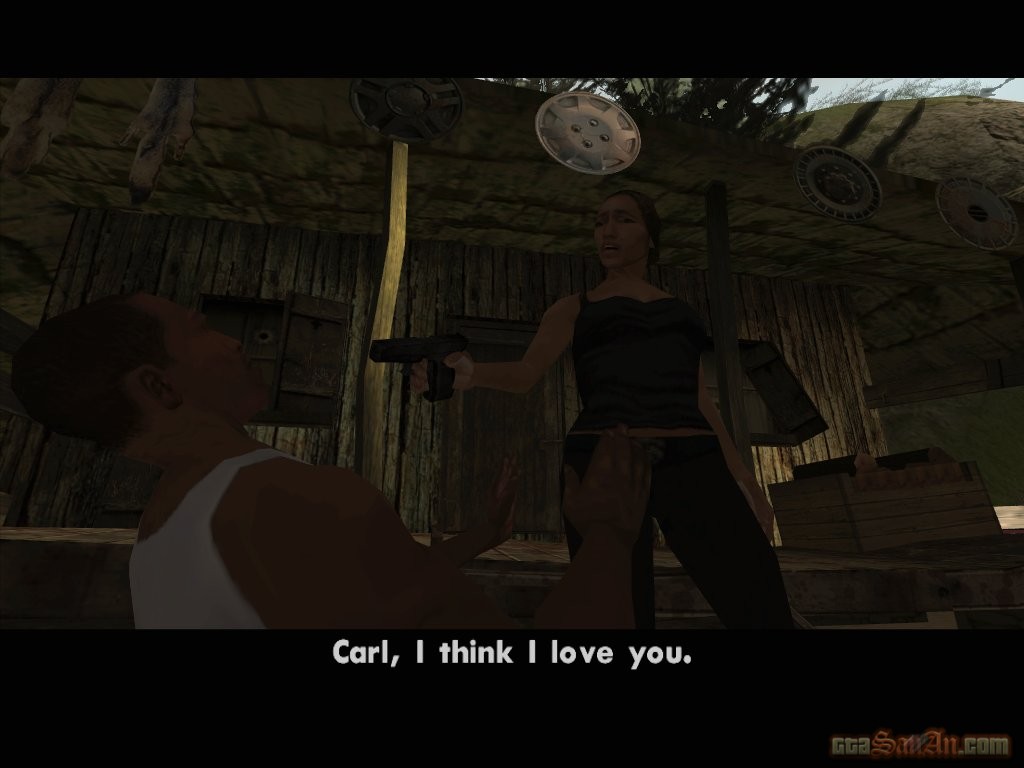
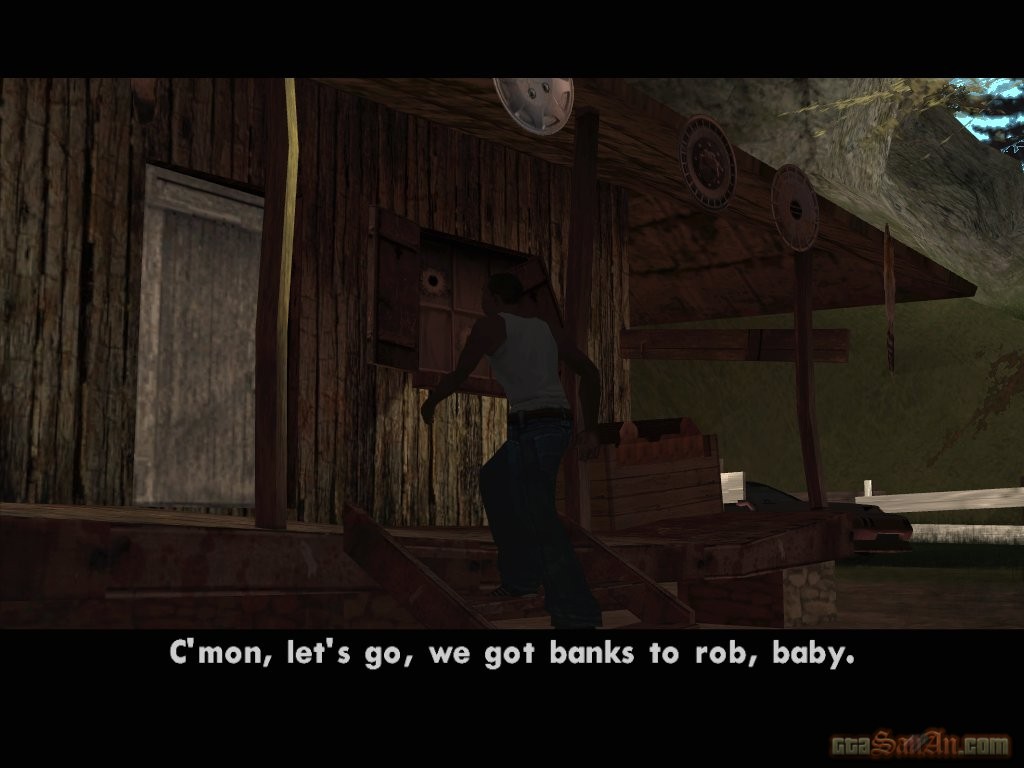
CJ knocks on Catalina's door, but she's ignoring him, or she isn't in. CJ is very apologetic and shouts his feelings for Catalina, just incase she is listening. However, there is no reply. He walks away from the house, and mutters 'stupid bitch'. Suddenly Catalina attacks him from behind and holds a gun to his head. CJ begs for his life, and to prove how sorry he is, he says they are going to play rough, and rob banks, and she can kill whoever she wants to kill. Catalina says she loves him. Earlier on, Catalina set 4 soft targets -- a liquor store in Blueberry, a bank in Palomino Creek, a gas station in Dillimore and a betting shop in Montgomery. One of them should be done at this point, with 3 remaining. If you followed the advice given earlier in the walkthrough, you should have dollar signs on your radar at the liquor store in Blueberry, the bank in Palomino Creek and the betting shop in Montgomery. These missions are relatively easy, so just pick the mission that is closest. That would be the liquor store in Blueberry, so head off there.
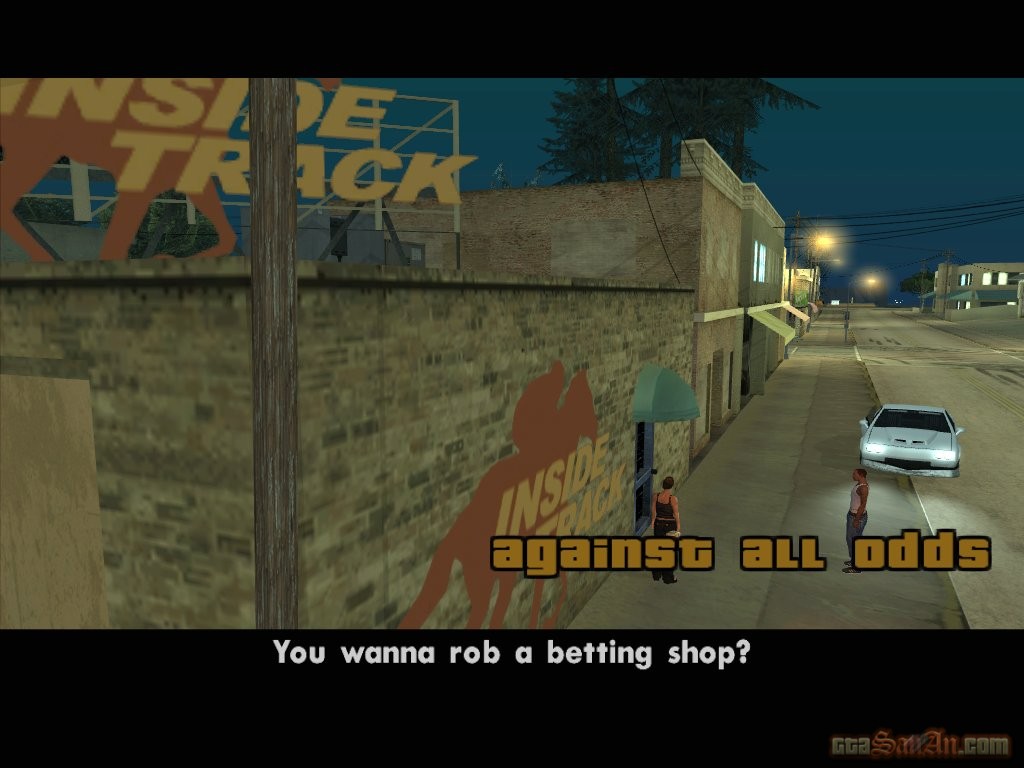
Go and see Catalina, you have got banks to rob! CJ knocks on the door, and Catalina's voice can be heard. She tells him to come inside. CJ goes in, and from there-on it's a bunch of loud screams and ow's, as Catalina tortures him. There are two robbery locations remaining, represented by the Green Dollar "$" signs on the radar. If you've been following this walkthrough since the start, you should have a green dollar sign at the bank in Palomino Creek, and the betting shop in Montgomery. The betting shop offers a larger reward, and is slightly less challenging than the bank robbery in Palomino Creek, so that may be the most suitable choice.
This is the final cutscene mission for Catalina. This time she is angry, very angry. Apparently she has had enough of you and from now on you're simply her business parter. She's not in a good mood today, so anybody that messes with her is going to get killed, including you. By this point you should have 1 dollar sign on the radar, marking the last robbery location. If you took the advice earlier, you should be left with the bank in Palomino Creek, so head off there.
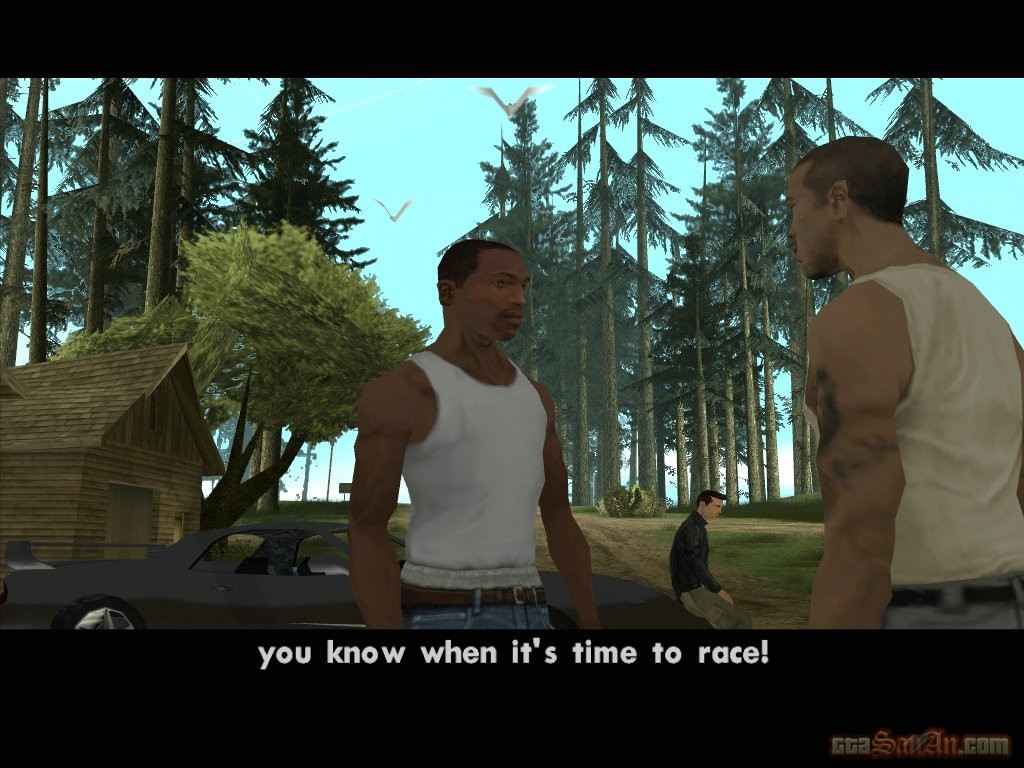
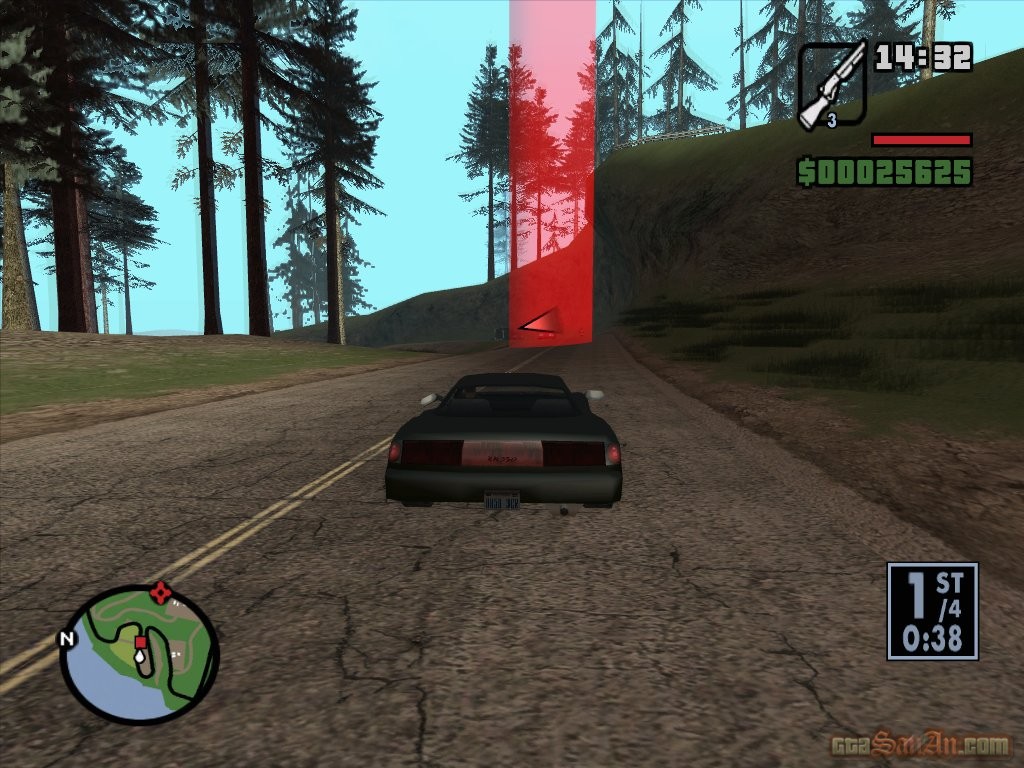
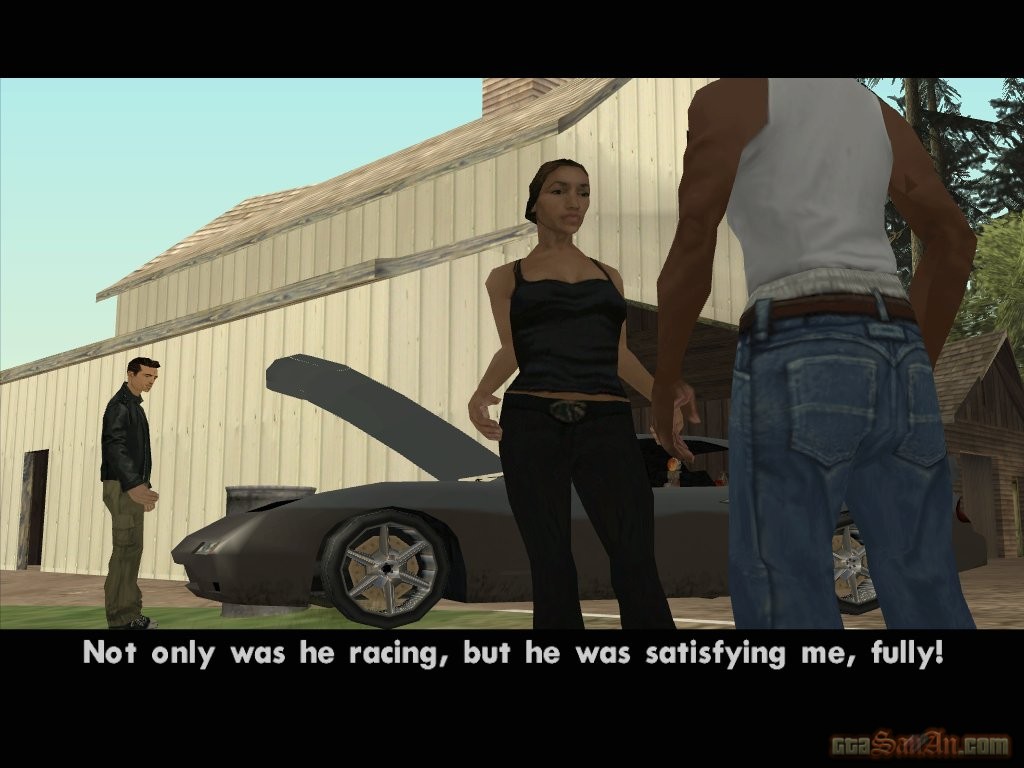
Cesar arrives late, apparrently he didn't know when the race was starting. Wu Zi Mu, a San Fierro businessman, introduces himself. He explains that they like to race out in the country for cash rewards or pink slips - the racers choice. He wishes you luck (Note: You'll see Claude in the background, the main character in Grand Theft Auto 3). This is without a doubt the easiest race in the game, much easier than High Stakes, Lowrider, and even that was easy. I highly recommend using the Rancher. It's big, it's sturdy, and it's slow. Ironic, yes, because Cesar said it was all about fast cars, but speed is the main cause of accidents in this mission. Although the other racers look as if they're driving full speed, trust me, they are not. Take your time, and turn corners slowly to prevent the car from flipping or diving into the water because you missed a bridge. You should finish well in front of the other 3 racers. You need to finish in 1st place to pass this mission. Wu Zi Mu will congratulate you, and comment on your driving skill. Local police don't appreciate this sport, so he'll need to leave shortly. Woozie hands you his card, and tells you to visit him if you ever find yourself in San Fierro. The sound a police car is heard in the background, and Woozie leaves. $5000
Goto the red marker at the 'cV' (Cesar Vialpando) icon on the radar, in The Panopticon. Catalina pulls a cane out of a car trunk, and kisses her new lover. She is very angry at Carl, because by the looks of things he prefers the curves of a car to those of a real woman. When she said she wanted to be business partners, she meant that she loves you, and when she said that she isn't interested anymore, she meant that she loves you. But it's too late now, and she tries to make Carl jealous by introducing him to her new boyfriend, Claude (the main guy from Grand Theft Auto 3). It's time to race. This time, you can't choose a vehicle. You're given a ZR-350, and you must finish 1st place to complete the mission. Again, this race is relatively simple. Take your time, especially when turning corners. To be honest, it's hardly a 'race' - just a nice ride through the country. When the race is over, Catalina says you had the unfair advantage. She hands you the deed to a garage in San Fierro - Claude needs his car so that him and Catalina can goto Liberty City. That's the last you will be seeing of Catalina. *Truth calls. He's got your stuff, so go and see him.

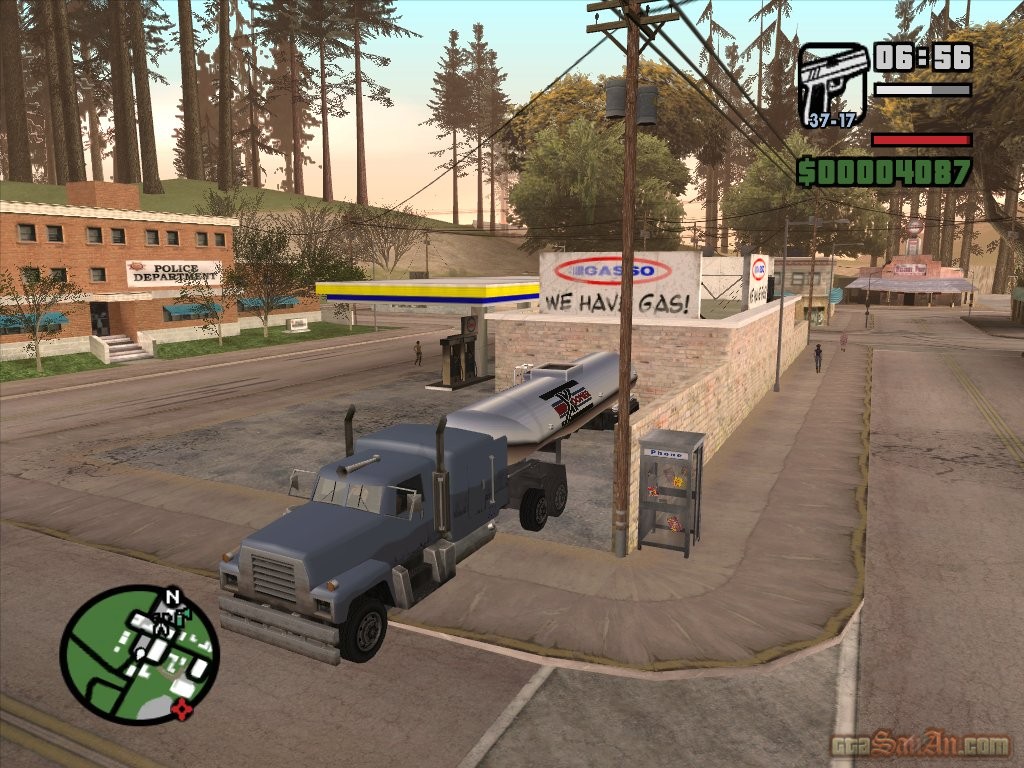
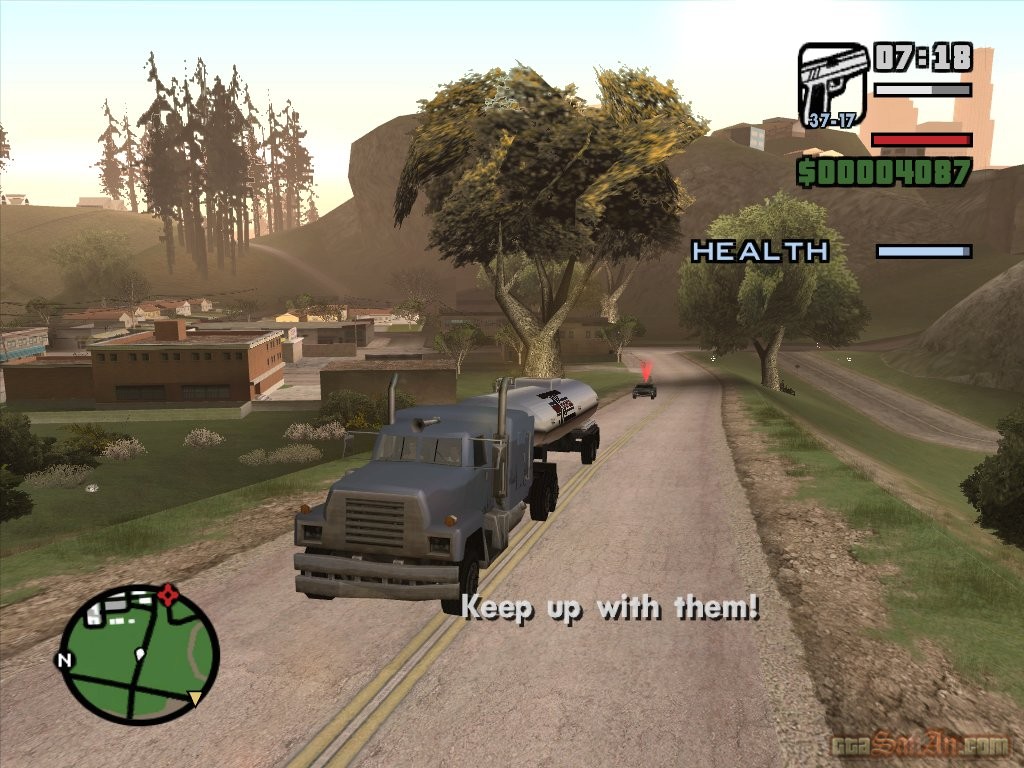
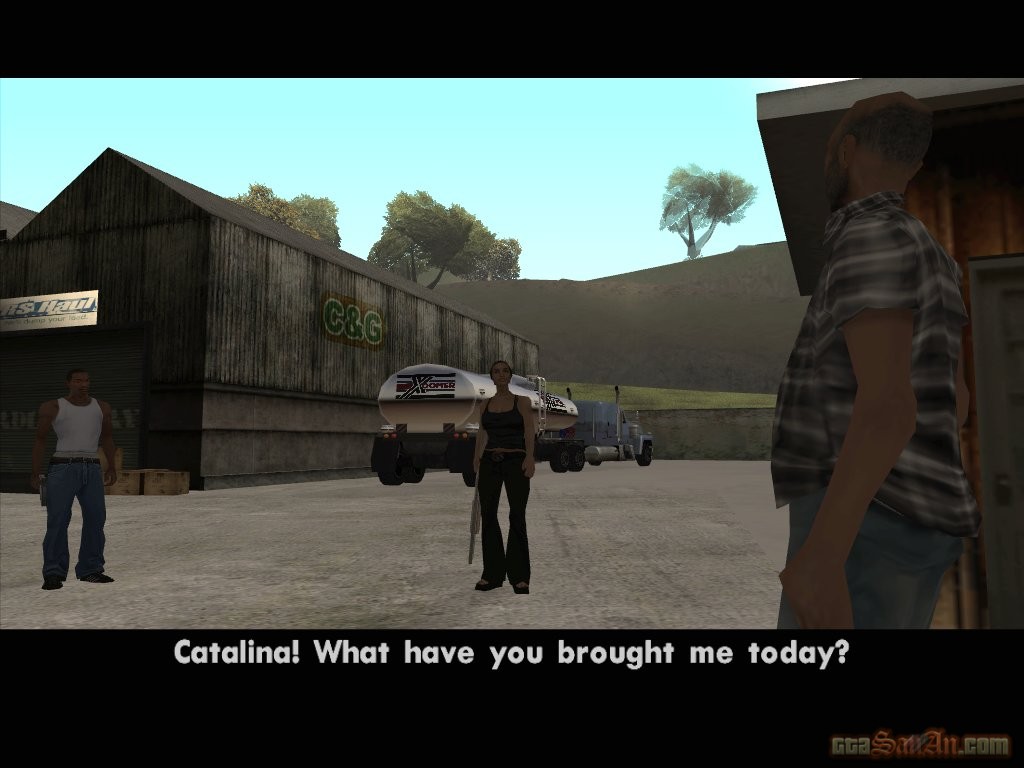
This involves robbing a gas station in Dillimore. Stop in the red marker, and watch as Catalina attempts to rob the place. She points a gun at the window, and tells them to hand over the cash. There are two men inside. One wants to hand over the cash, but the other refuses to lose another job because of some crazy ass bitch. He tells Catalina that the glass is bulletproof, and that he won't be giving her any money. Change of plan -- Catalina wants to steal the tanker. Get in the cab with Catalina, and position it in front of the tanker. The cab and the tanker must be aligned perfectly. Slowly back into it, to attach the cab to the trailer. However, the owner is determined to fight back and keep his job. They get in a car, and chase. Catalina knows somebody who will pay for this rig and its cargo, so follow the blip on the radar. Keep focused on your destination and don't pay too much attention to the chasers. A health bar appears for the tanker. Drive out of the gas station, go across the little road in front and turn right. Go straight forward until you reach a dead end and the only option you have is to turn left or right. Turn left, and the stop is at the bottom of the hill. You must take great care whilst driving the tanker, so as not to detach the trailer or topple it. Turn corners slowly, and don't make them too sharp (if your turn is too sharp, the tanker will detach and the mission is failed. If necessary, drive across the grass when you reach a corner to keep the tanker as straight as possible). Catalina makes the deal with Mr. Whittaker, before heading off on a bike. Mission complete. The trucker missions are now unlocked. » Map $5000 *You recieve a phone call from somebody called The Truth. CJ has no idea who he is, but he explains that they both have the same friend and business partner -- Officer Tenpenny. Truth has a room in a motel in Angel Pine, go and see him sometime.
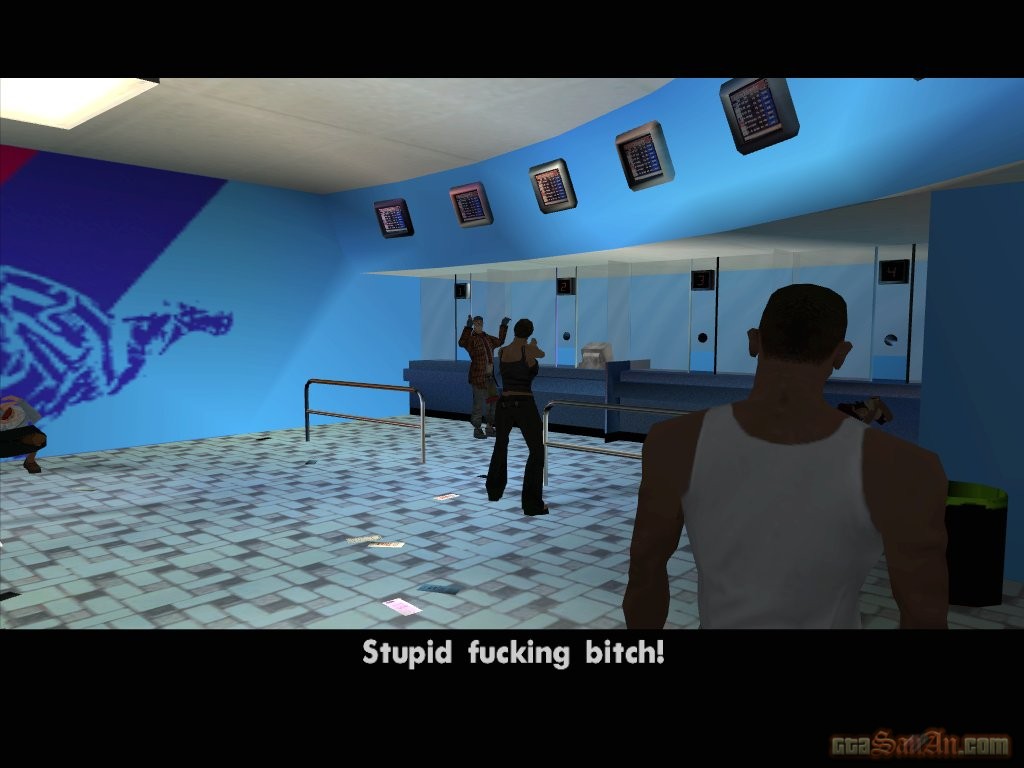
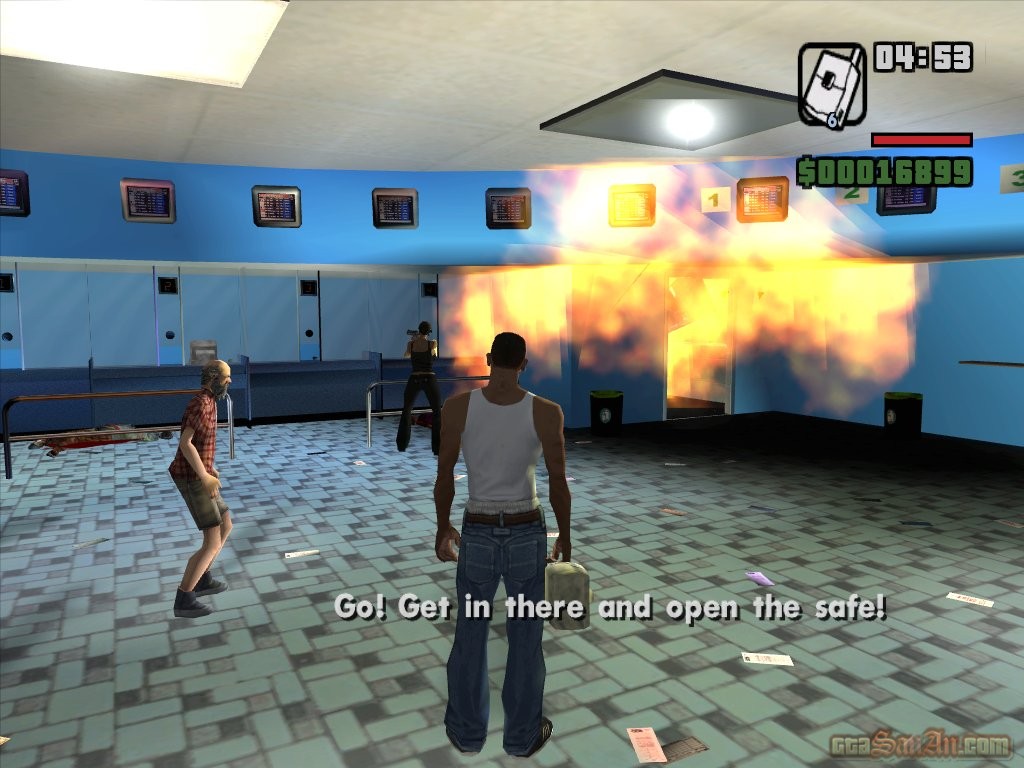
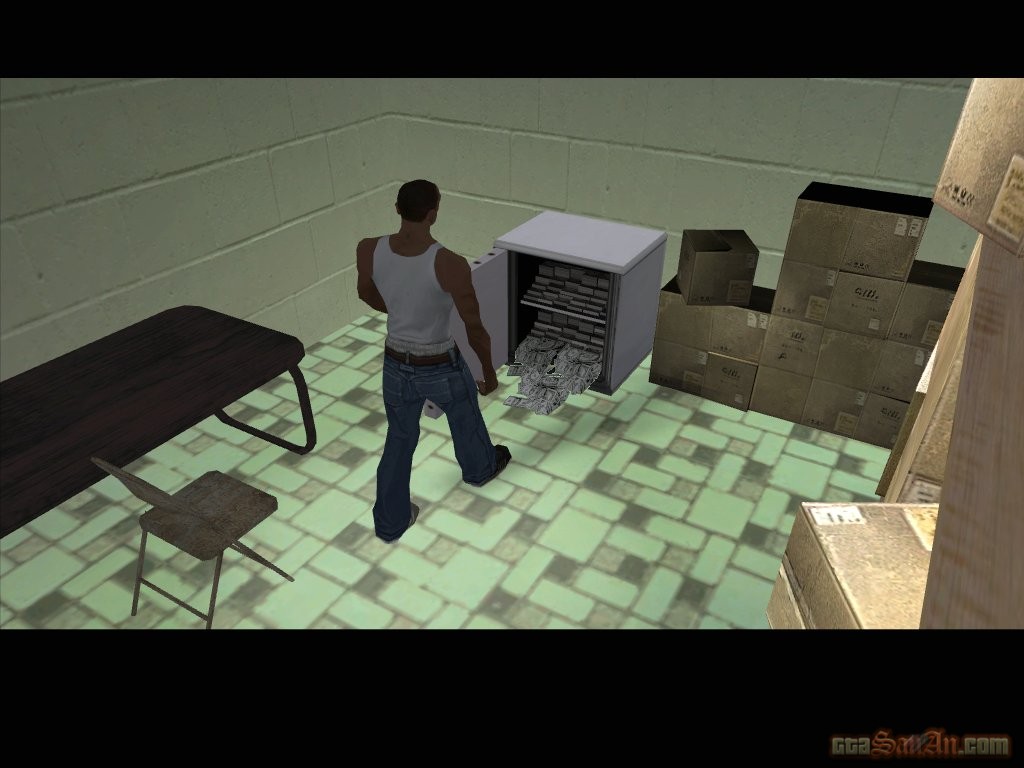
This involves robbing the betting store in Montgomery. Stop in the red marker outside the betting shop and Catalina will give you satchel charges. Enter the betting store and Catalina will hold a gun towards the staff. One of the staff pushes the alarm after Catalina warned her not to. She's now history. Catalina orders you to blow the door open, in order to gain access to the safe. Press 'Circle' to throw the satchels and hold it for longer to increase the throwing distance. Throw about 2 or 3 satchel charges onto the door, and stand well back from it. Flick through your weapons until you reach the detonator, and press 'Circle'. The door will blast open, and you now must do the same to blow the safe open. This will only require one satchel. Once the safe is open, CJ will take the cash, and a 4-star wanted level appears. Get some wheels, head to the pay n' spray marked on the radar (keep an eye out for the police bribe under the Montgomery intersection) and get back to Catalina's hideout. $2000
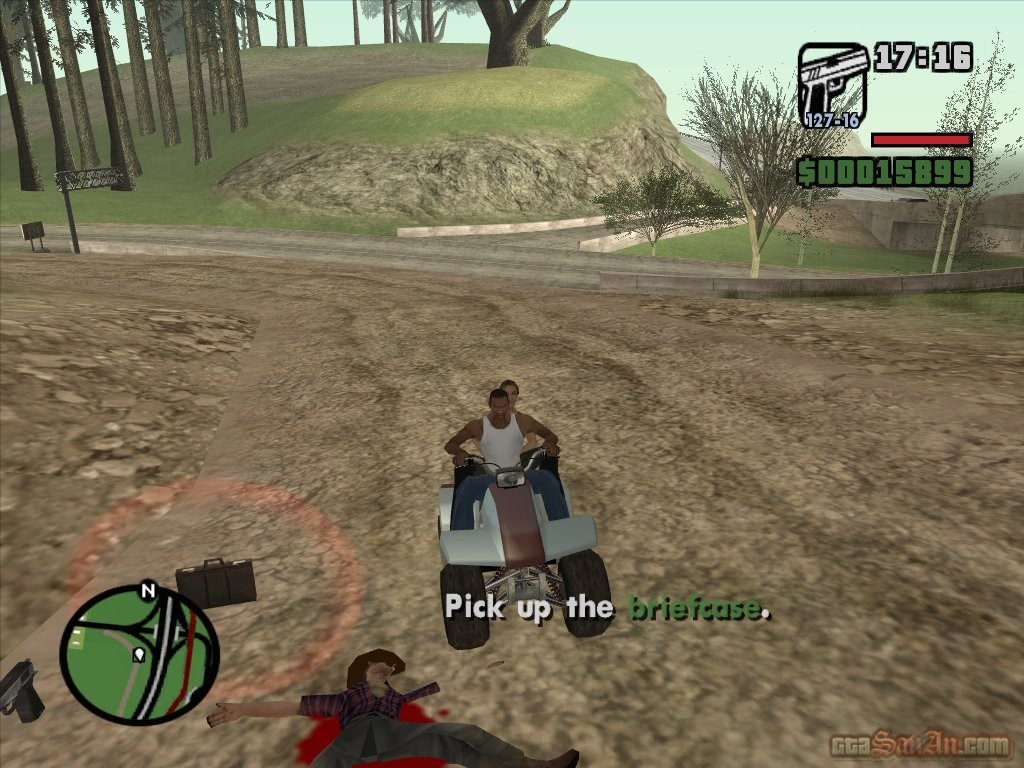
It seems that some other robbers got there first, and they're getting away with your money! Catalina shoots one of them off of his quadbike, as they try to escape. Get on the quadbike with Catalina, and she'll shoot from behind. Chase the 3 robbers. You can help Catalina by shooting forwards on the quadbike, by pressing 'Circle'. Use the L2 and R2 buttons to look left and right. Once you have shot the first robber off of his quadbike, a green blip is marked on the radar representing the briefcase full of cash. Leave the briefcase for now, and chase the other 2 robbers. Once all of the robbers are dead, go back and collect the briefcases. Return to the hideout and stop in the red marker. Carl tells Catalina that he desperately needs money. Catalina promises that they will rob a real bank next time. $1000 *Cesar calls and says that he has been busy racing. He's talking about street racing, not beautiful cars, but fast cars. Street racers meet out in the countryside for cash. Get a fast car and meet Cesar and Kendl south of Montgomery.
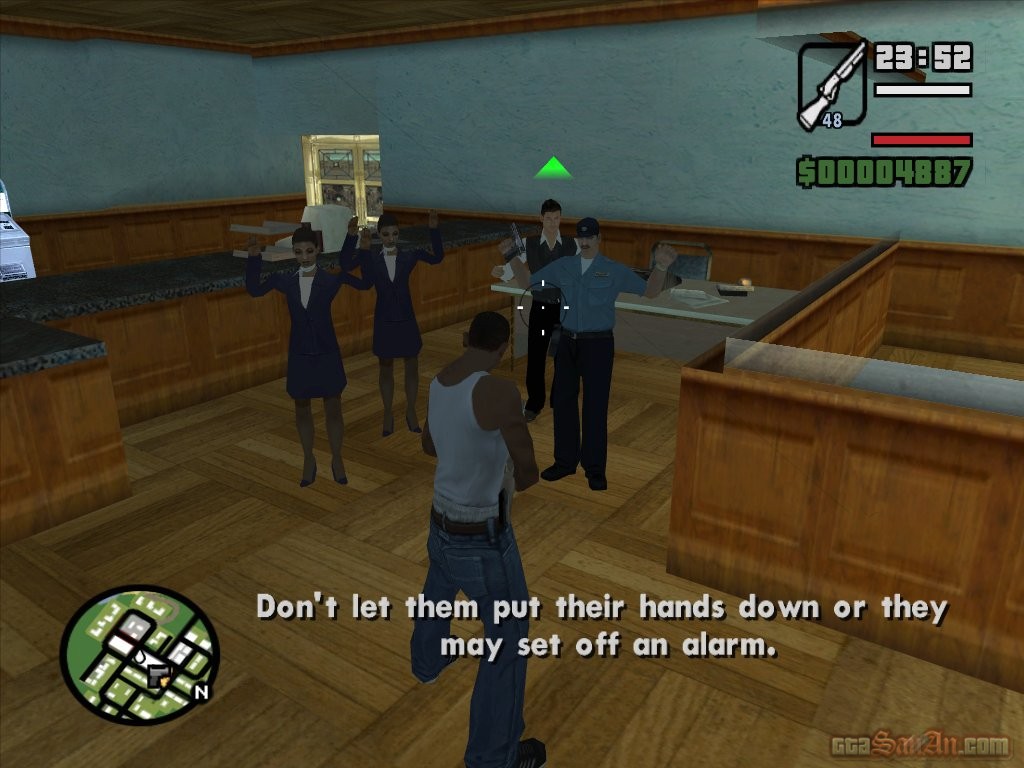
Time to rob a real bank. Stop in the red marker at the bank in Palomino Creek. CJ and Catalina threaten the staff with guns, and Catalina demands that they hand over the cash. She's going to empty the safe. Meanwhile, keep the staff covered. Point your gun at the staff to keep them scared and under control. Common sense tells us that we can't aim at 4 people at the same time, so one of the staff will reach for the alarm, and all hell breaks loose. The local police are contacted, and make their way to the robbery scene. 2 police bikes and a rancher park outside. Smash the ATM's and get as much cash as possible (each ATM requires 2 rifle shots). Once all 3 ATM's have been destroyed, follow Catalina through the back door. You'll gain a 2-star wanted level, and some cops attack. Kill all of the cops with Catalina, and 2 more police bikes will enter via the alleyway. Shoot both of the cops, and grab a bike. Keep up with Catalina as you race through the countryside. Eventually Catalina comes to a stop, and she is surrounded by officers. Protect Catalina, and take her home. During the journey home, CJ says she needs to calm down. Catalina explains that he knows nothing about the female heart, and that he's to go back and see her when he does know something. $1000 *Catalina calls. She wants to see you immediately. If you've already done two of Catalina's missions then you don't have to.

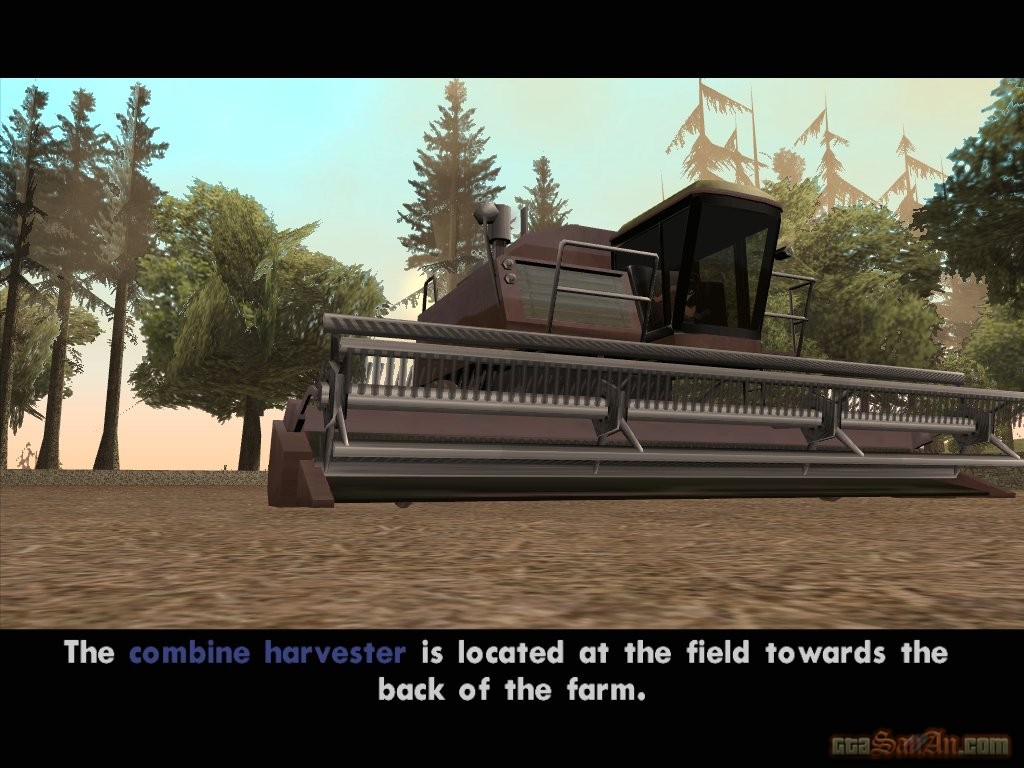
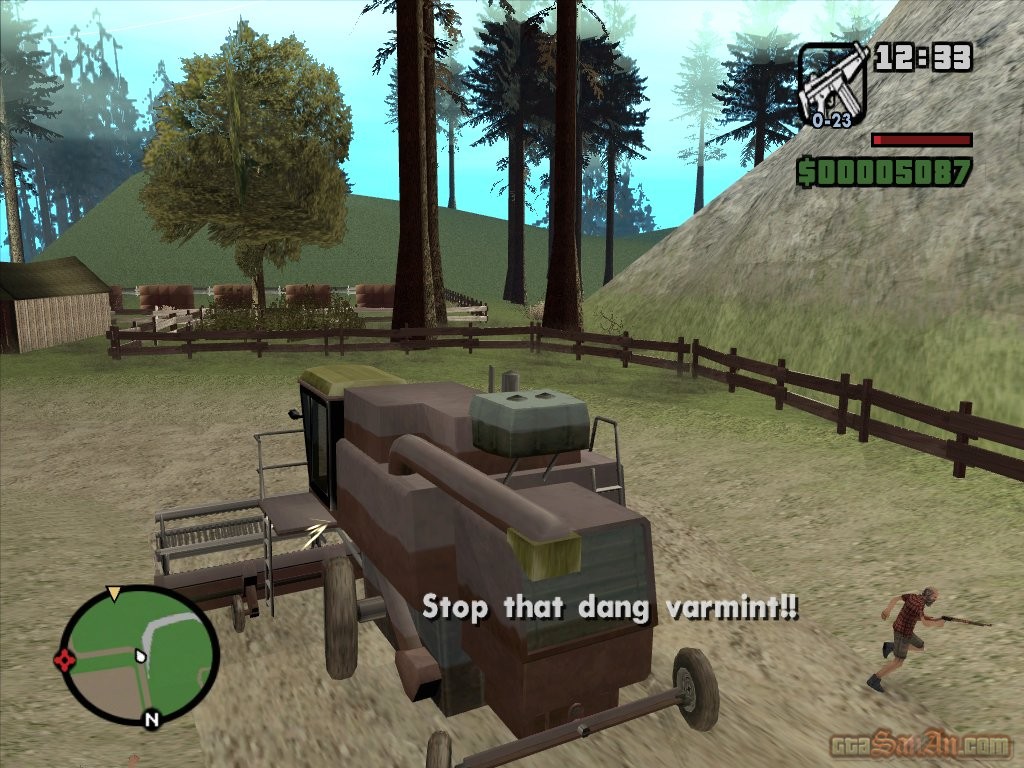
Walk into the red marker at the motel in Angel Pine, and a cutscene will begin. Tenpenny is stoned, he has become dillusional. He introduces you to Truth, who will be supplying you with some of the finest weed. Truth enters the room, and Tenpenny explains that Carl will be paying Truth the money for his weed. Tenpenny leaves, and Truth has a job for you. Some farmers across town have a combine harvester, and Truth needs one. Get it and you can pay Truth. The combine is located at "The Farm", which unfortunately is half way across the countryside. This is however, a good time to increase your driving skill. Follow the yellow blip on the radar, and walk into the red marker. The combine harvester is located at the field towards the back of the farm. There are several groups of survivalists working and they will not take kindly to strangers. There is one farmer towards your left, and he carries a rifle. Take him out from a distance, and continue moving into the farm. Two farmers on tractors will move towards you, and repeatedly run you down. If you shoot at the tractors they will eventually blow up, but you risk losing a lot of health using this method. Instead, pull the farmers out of the tractors and kill them from there. There's another few farmers up ahead at the turn, and another few in the field where the harvester is located. As you approach the combine, the driver will flee. Enter the combine, and exit the field by heading west and following the dirt path. Some more angry farmers greet you as you exit the field. Simply drive over any attackers and the combine harvester will slice them. Take the harvester back to Truth's farm. As you leave the farm, a car with some angry farmers will chase. Get out of the harvester and kill the farmers, to avoid any damage to the harvester itself. Turn left and take the first right. Drive down to the dirt path until you reach Truth's farm, and stop in the red marker. A cutscene begins, and Truth says he will call you when the stuff is ready, so make sure you have the cash. Respect + *Cesar calls and reveals that the Varios Los Aztecas have gone down. Respect, loyalty and honour mean nothing in Los Santos anymore. CJ orders him to take Kendl out of Los Santos, and rent a trailer at Angel Pine. Go and see Cesar at Angel Pine. There's a BF Injection at Truth's farm that you can use to get there.
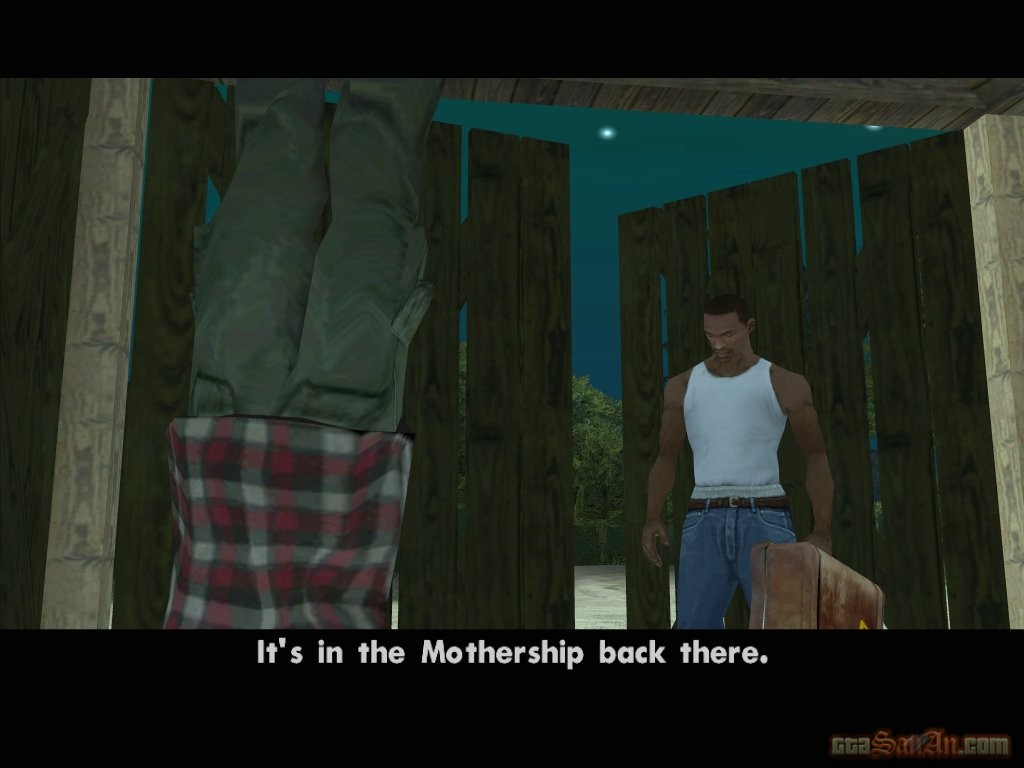
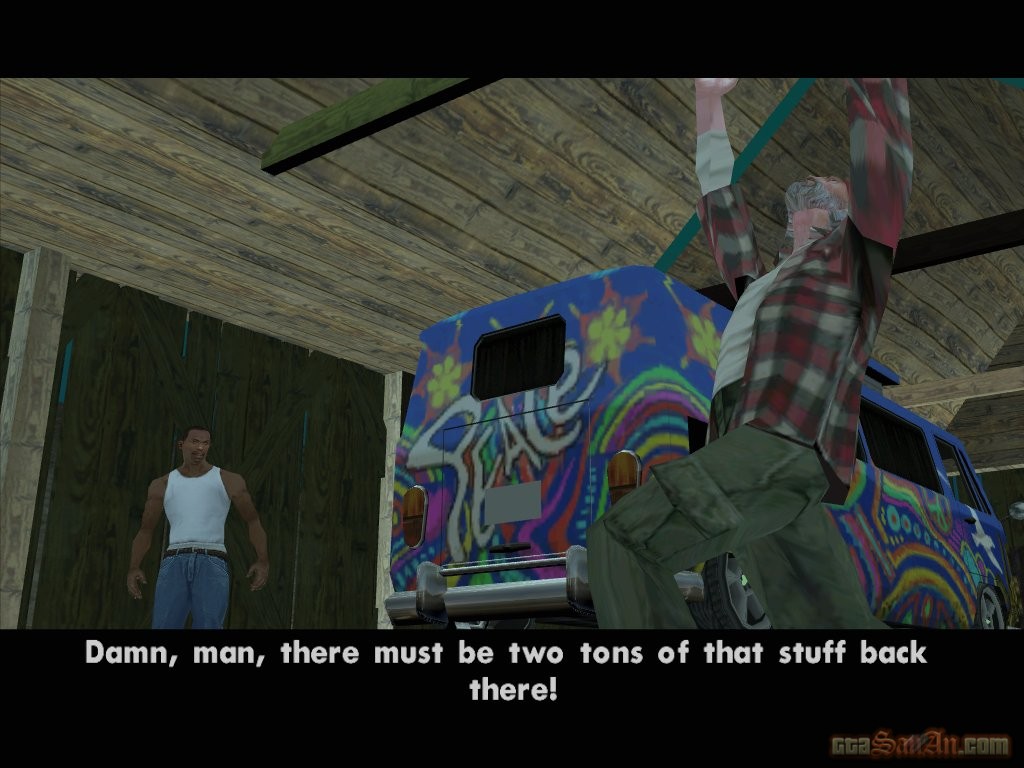
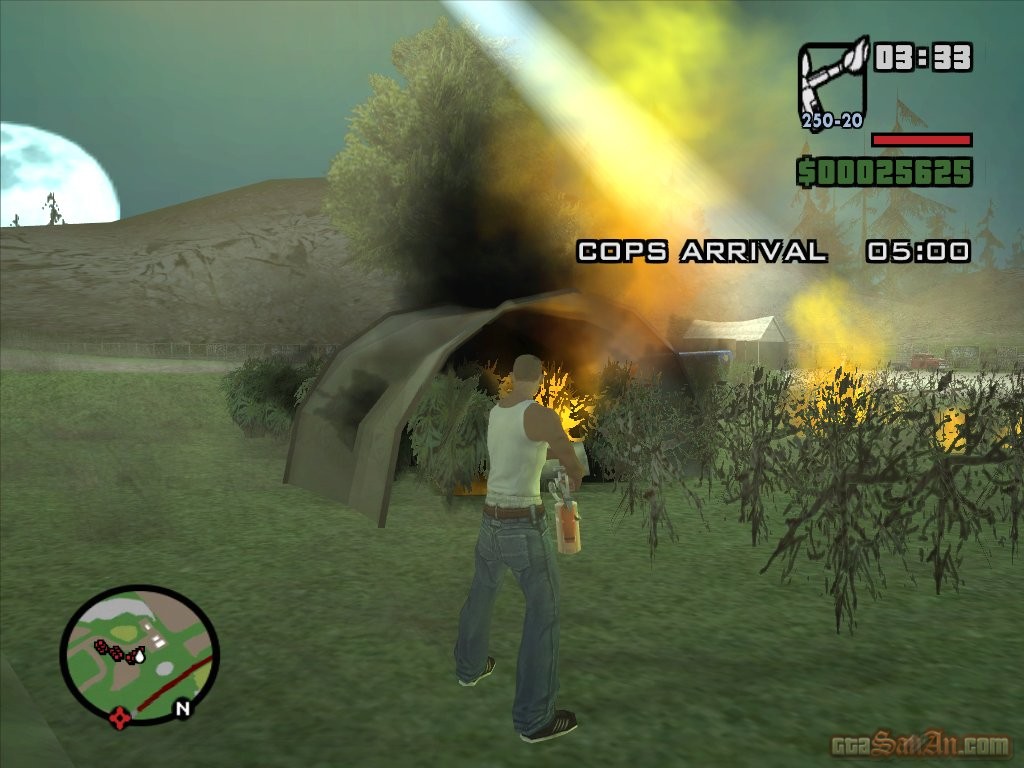
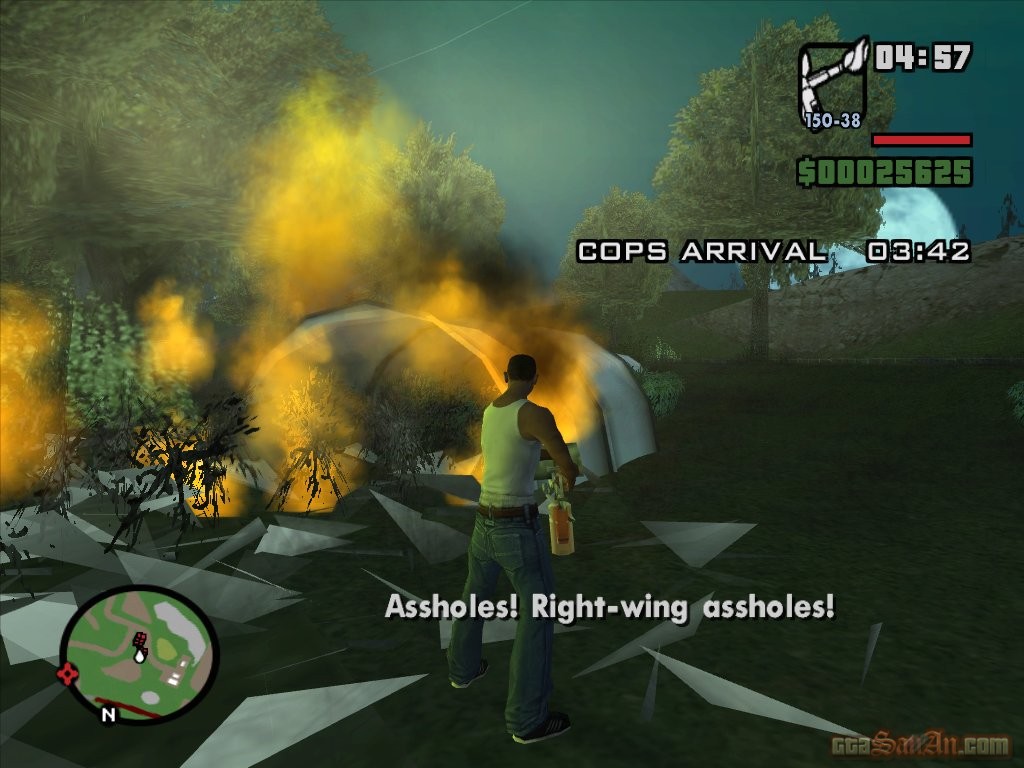
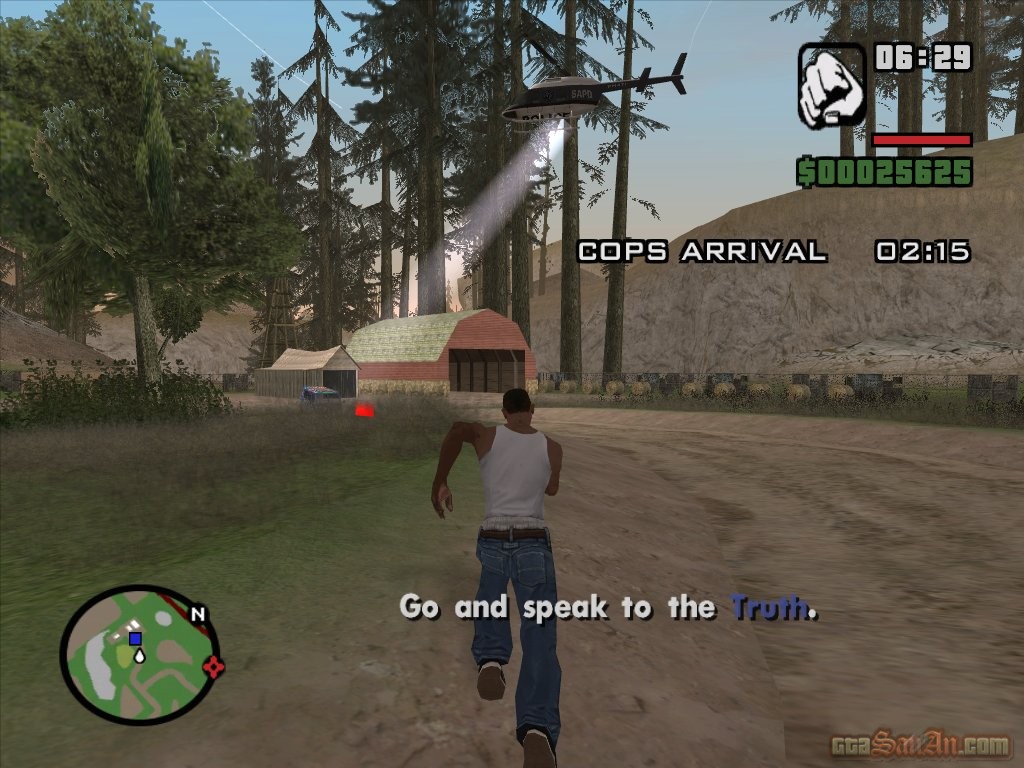
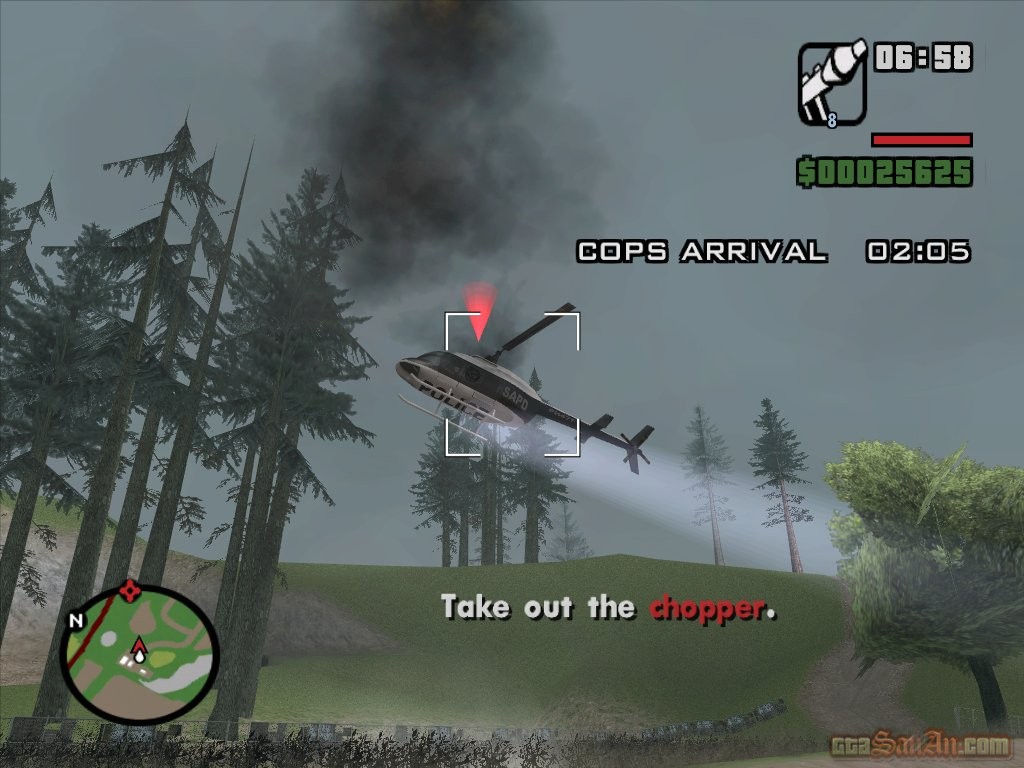
Truth has a green village up in the hills - go and see him. Carl hands over the cash, and collects the goods from the mothership. Suddenly there's a loud noise. It's a police chopper. Truth grabs 2 flamethrowers, and hands Carl one. Go and help Truth destroy the weed. Hold R1 to aim with the flamethrower, and destroy all the weed (represented by the red blips on the radar). You have 5.30 minutes (5.30 game hours) to burn everything before the cops arrive. Because of the drugs, Carl will become dizzy and it becomes increasingly difficult to burn the weed. Truth gets the mothership fired up, and ready to go. Once all of the weed has been burned, go and speak to Truth. He hands you a rocket launcher, to take out the chopper. Get a couple of shots in at the chopper after the cutscene, but if you miss, follow it to the end of the road where Truth will stop. Once the chopper has been struck, stand well away from the explosion. Get in the mothership and drive to the garage (Truth hasn't driven in 15 years) that you won in San Fierro. CJ calls Cesar during the journey, and tells him to meet at the garage. You discover that the garage is infact run-down, and basically of no use to you. Stop in the red marker, to complete the mission. You can now save your progress in San Fierro. We're back into the city, baby. Respect + *Cesar calls, and he's been doing a little research. Every Monday and Friday cash leaves Los Santos for San Fierro, and every Wednesday and Saturday a courier takes the yay back to Big Smoke. Keep an eye out.
|


No comments:
Post a Comment